Microsoft Teams Direct Routing

Introduction

Microsoft Teams Direct Routing allows your organization to use DIDWW as a SIP trunk provider for Voice IN and Voice OUT services within MS Teams. This capability allows customers to enjoy all the benefits and features of the Microsoft Teams phone system while maintaining their existing DIDWW phone numbers, contracts, and competitive calling rates. This user guide introduces MS Teams Direct Routing integration with DIDWW SBC and describes the prerequisites for configuration.

Getting started

What you need to get started:

Domain setup and verification

If all prerequisites are met, you will need to activate the domain in the Microsoft admin portal before setting up Direct Routing in Microsoft Teams.

Before you start, make sure you have the Global Administrator rights in your tenant in order to add domains.

Step 1. Login to https://admin.microsoft.com/Adminportal/ and go to Settings –> Domains –> Add Domain.

Add the domain provided by DIDWW (Fig. 1).

../../_images/figure17.png

Fig. 1. Adding a domain.

Step 2. Click on Use this domain and verify it on the following page. Then select Add a TXT record to the domain’s DNS Records. (Fig. 2).

../../_images/figure22.png

Fig. 2. Verifying the domain on Microsoft Teams.

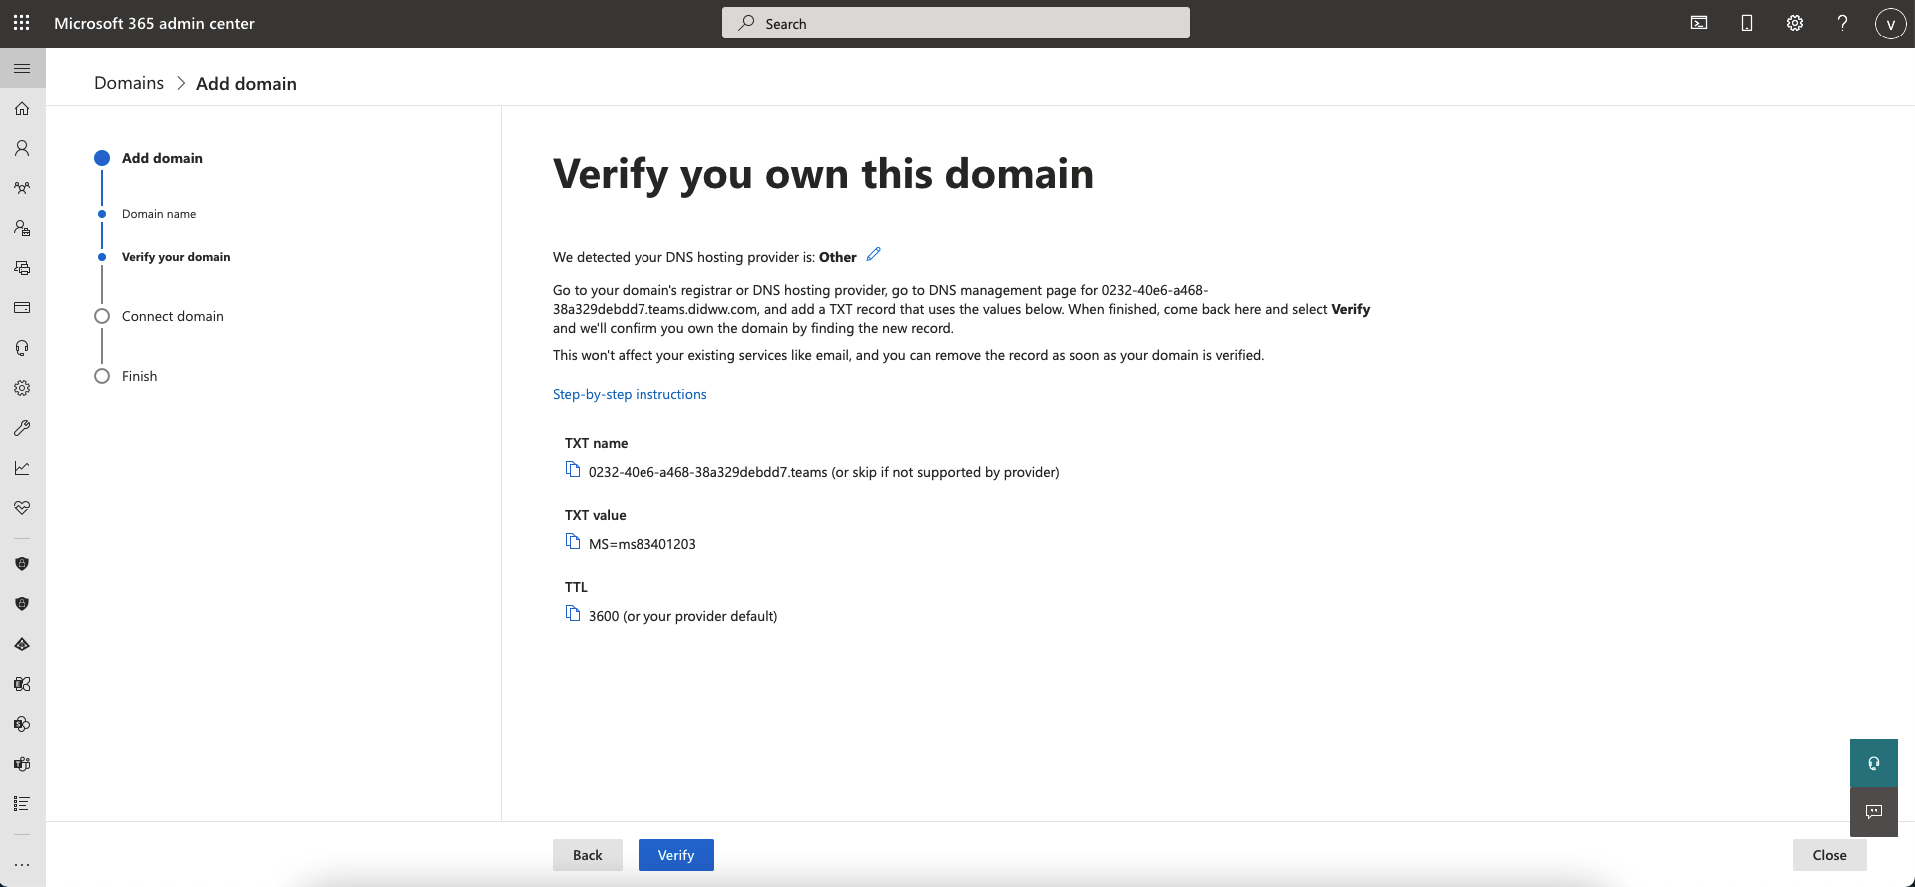
Step 3. Click on Continue and take note of the TXT value. (Fig. 3).

../../_images/figure32.png

Fig. 3. Information required to verify the domain.

Step 4. Share the TXT Value from the MS Teams portal with your DIDWW representative (your account manager or sales@didww.com).

Step 5. After getting a confirmation from your DIDWW representative about the applied changes, go back to Microsoft 365 admin center and click on the Verify button (Fig. 3).

Step 6. On the next page, select More Options , then Skip and do this later and click Continue (Fig. 4).

Note

It is not required to add Microsoft DNS Records as they are only needed for email and instant messaging, but not for Direct Routing.

../../_images/figure52.png

Fig. 4. Skipping the Microsoft DNS part.

You will see a screen menu indicating that the setup is complete (Fig. 5).

../../_images/figure62.png

Fig. 5. Completed domain setup.

Domain activation

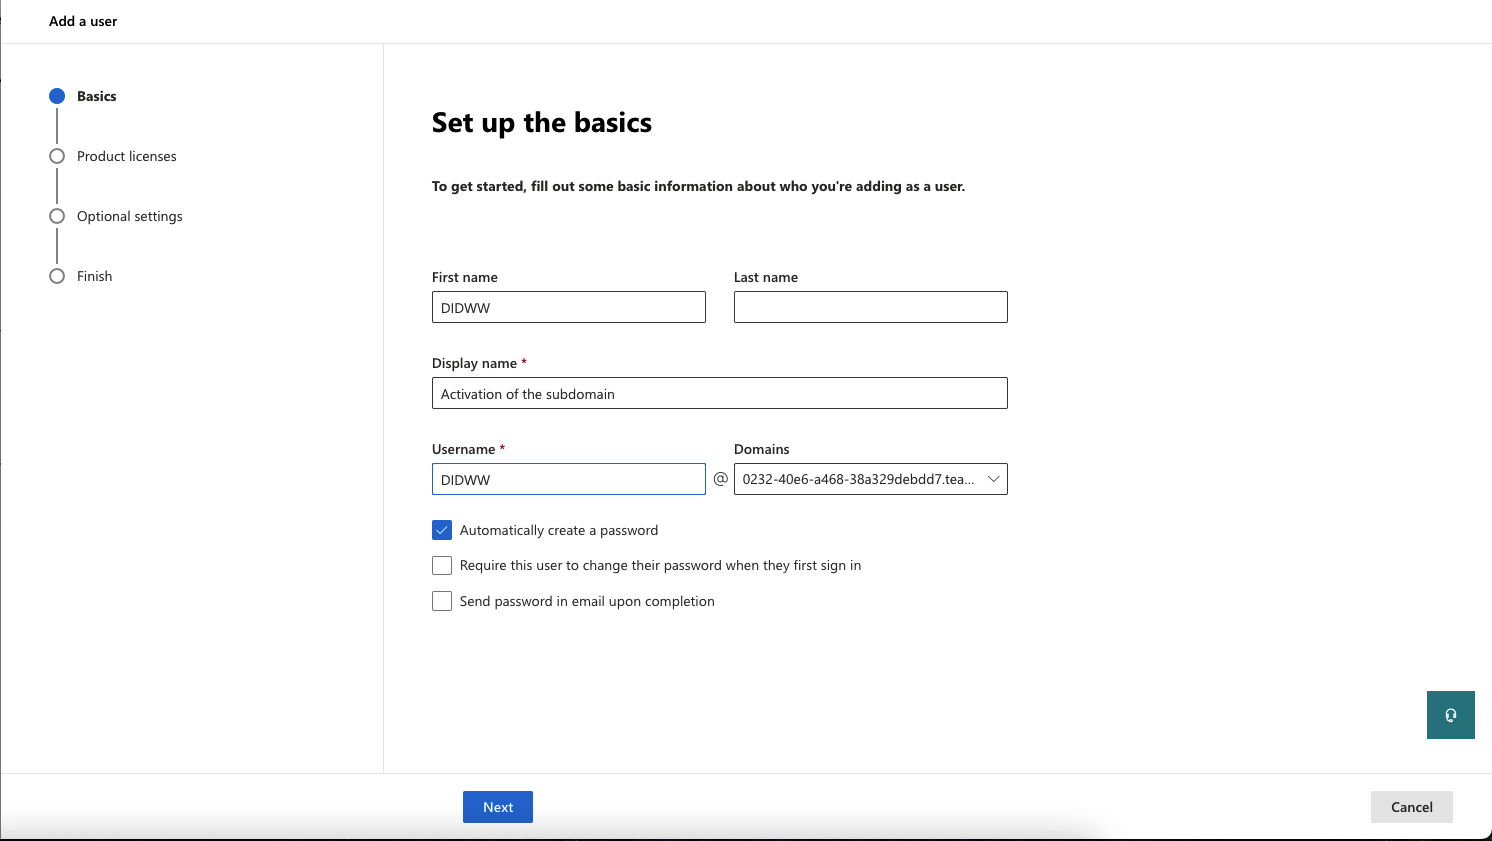
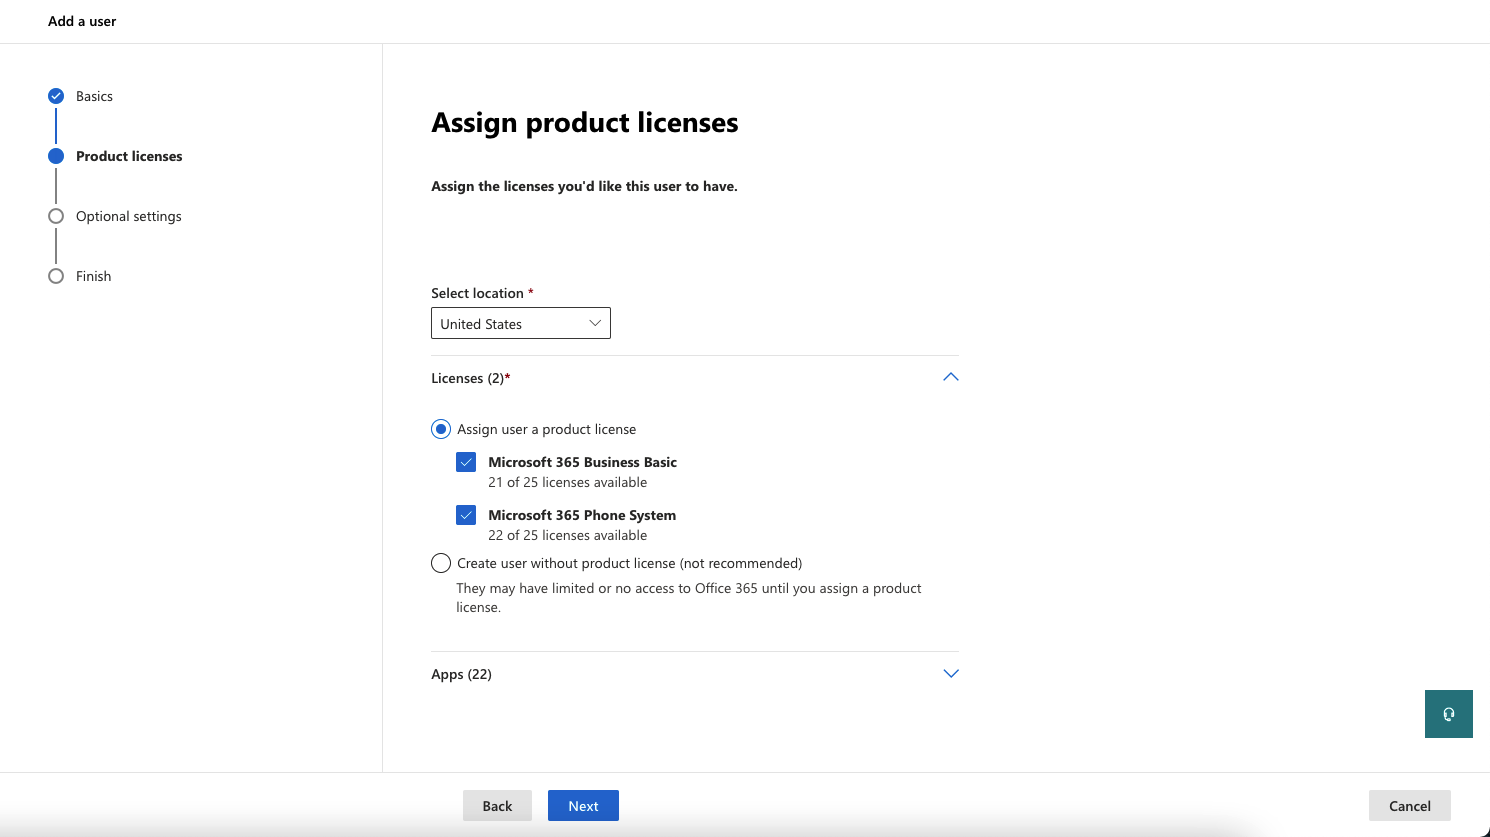
Step 1. After registering a domain, you need to activate it by adding at least one user and assigning an address matching the created domain in the customer tenant(Fig. 6).

Please review Get help with Microsoft 365 or Office 365 domains for more information about adding users in Microsoft 365 or Office 365 organizations.

For example: DIDWW@0232-40e6-a468-38a329debdd7.teams.didww.com

../../_images/figure72.png

Fig. 6. Activating the domain.

Step 2. Assign Microsoft 365 Business License + Phone.Systems addon or just E5 license to the user (Fig. 7).

For more information regarding Microsoft licenses refer to Plan Direct routing

../../_images/figure82.png

Fig. 7. Assigning License.

Direct Routing Configuration

Configuration can be done using the web or with PowerShell.

Step 1. For the web configuration, login to the Teams Admin Center (https://admin.teams.microsoft.com) with Tenant Administrator credentials (Fig. 8).

../../_images/figure92.png

Fig. 8. Teams Admin Center.

Add DIDWW SBC to Direct routing

Step 2. In the web interface, select Voice tab, and then click Direct Routing. Under SBCs click Add (Fig. 9).

../../_images/figure111.png

Fig. 9. Adding SBC to Direct Routing.

../../_images/figure121.png

Fig. 10. Configuring new SBC.

You can use the following PowerShell command for creating a new Online PSTN Gateway:

New-CsOnlinePSTNGateway -Identity 0232-40e6-a468-38a329debdd7.teams.didww.com -SipSignalingPort 5061 -Enabled $True -MaxConcurrentSessions 100

Add Voice Route and PSTN Usage

Step 3. In the web interface, under Direct Routing, select Voice routes, and then click Add (Fig. 11).

../../_images/figure131.png

Fig. 11. Adding a Voice Route.

Step 4. Create a new Voice Route and assign the SBC (Fig. 12).

../../_images/figure141.png

Fig. 12. Assigning a Voice Route to SBC.

Step 5. Add new PSTN usage record (Fig. 13).

../../_images/figure151.png

Fig. 13. Assigning PSTN usage record to the voice route.

The same steps can be done using the following PowerShell commands:

1. Creating PSTN Usage:

Set-CsOnlinePstnUsage -Identity Global -Usage @{Add="DIDWW"}

2. Creating new Online Voice Route and associating it with PSTN Usage:

New-CsOnlineVoiceRoute -Identity "DIDWW" -NumberPattern "^(.*)$" -OnlinePstnGatewayList 1620-11ec-9621-0242ac130002.teams.didww.com -Priority 1 -OnlinePstnUsages "DIDWW"

Add Voice Routing Policy

Step 1. In the web interface, under Voice, select Voice routing policies and click Add (Fig. 14).

../../_images/figure161.png

Fig. 14. Adding a new voice routing policy.

Step 2. Create a new Voice Routing Policy and associate it with PSTN Usage Record (Fig. 15).

../../_images/figure171.png

Fig. 15. Assign PSTN usage records with new voice routing policy.

The same step can be done using the following PowerShell commands:

New-CsOnlineVoiceRoutingPolicy "DIDWW Route" -OnlinePstnUsages "DIDWW"

Assigning User to the Voice Routing Policy

Step 1. Under Users tab, select the preferred user and click Policies. Select Edit Assigned policies and assign DIDWW voice routing policy(Fig. 16).

../../_images/figure18.png

Fig. 16. Assigning the DIDWW voice routing policy in Microsoft Teams.

The same step can be done using the following PowerShell command:

Grant-CsOnlineVoiceRoutingPolicy -PolicyName "DIDWW Route" -Identity DIDWW@1620-11ec-9621-0242ac130002.teams.didww.com

Note

It may take up to several hours for changes to take effect.

Enabling User and assigning an on-premises DIDWW phone number

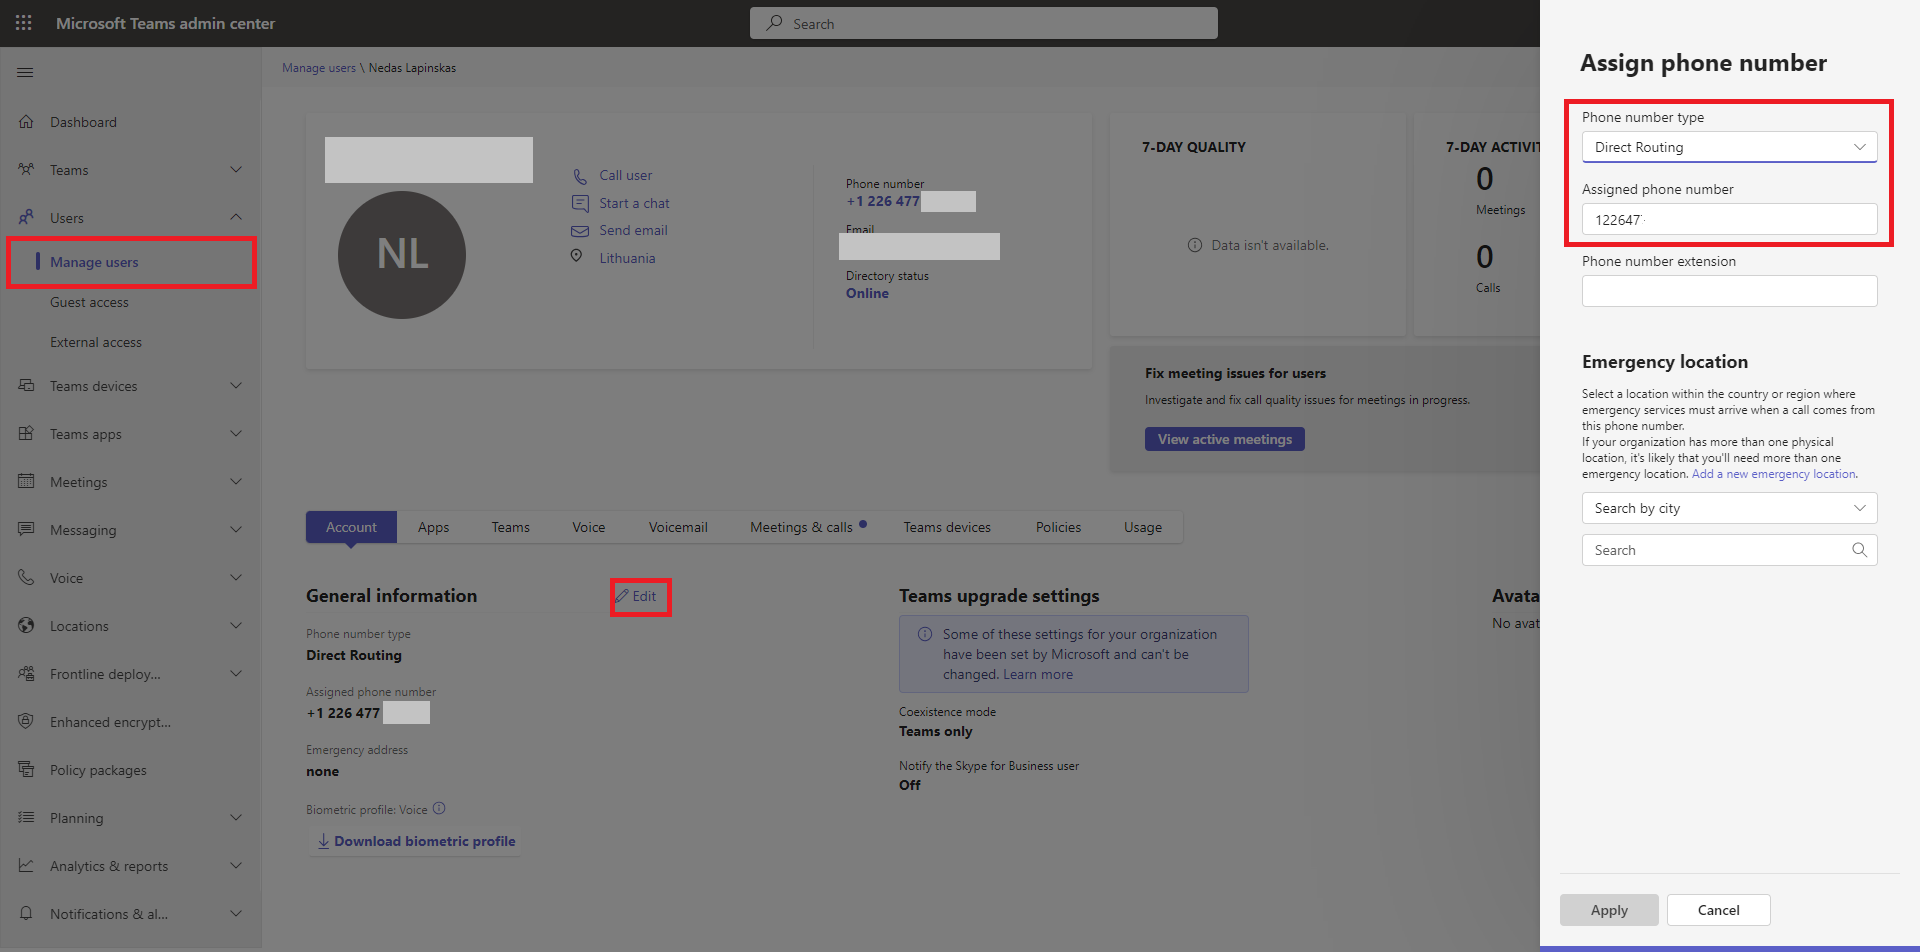
Step 1. Under Users tab, select the preferred user and click on its Display name. Select Edit by General information and select Direct Routing under Phone number type and enter DIDWW number under Assigned phone number (Fig. 17).

../../_images/figure19.png

Fig. 17. Assigning the DIDWW number to user.

Optional method is to use powershell to assign the number.

Set-CsPhoneNumberAssignment -Identity didww@1620-11ec-9621-0242ac130002.teams.didww.com -PhoneNumber +99999999999 -PhoneNumberType DirectRouting

Making a Test Call

After completing all the above steps, make a test outbound call via the MS Teams user client. To check inbound calls please make a test call to your DIDWW phone number and make sure you can answer it via your MS Teams platform.

For more information or additional troubleshooting please contact DIDWW Technical Support Team at support@didww.com.