# FreeSWITCH
[FreeSWITCH](https://freeswitch.org/) is an open-source telecommunications
platform for building IP PBXs, voice applications, gateways, and other
real-time communication systems. It uses SIP profiles, gateways, and dialplans
to control call signaling, media, and routing.
Use FreeSWITCH with **DIDWW SIP Trunking** to receive calls through a Static
Endpoint or Dynamic Registration trunk and place outbound calls through a
DIDWW outbound trunk. This guide configures DIDWW connectivity through the
external Sofia SIP profile.
This configuration applies to **FreeSWITCH 1.10 and 1.11** with the default
configuration and `mod_sofia`. It does not require third-party modules.
Note
FreeSWITCH configuration paths depend on the installation method. Package
installations commonly use `/etc/freeswitch`. Source installations
commonly use `/usr/local/freeswitch/conf`. The examples in this guide use
`/etc/freeswitch`.
---
## 1. Configure inbound voice trunk
Configure an Inbound SIP Trunk in the DIDWW User Panel to send incoming calls
from your DIDWW numbers to FreeSWITCH. Select the delivery method that matches
your FreeSWITCH deployment.
### Before you begin
- An active DIDWW account is required. [Sign in to DIDWW](https://my.didww.com/users/sign_in) or [create a DIDWW account](https://my.didww.com/users/sign_up#/users/sign_up).
- At least one active **DID number** with capacity to receive incoming calls is
required. If you do not have one, see
[How to buy numbers](../../phone-numbers/buy-numbers/how-to-buy.html).
### Step 1: Create New Inbound SIP trunk
1. In the [DIDWW User Panel](https://my.didww.com/#/trunks), go to
**Voice > Inbound Trunks**.
2. Click **Create New > SIP Trunk**.
[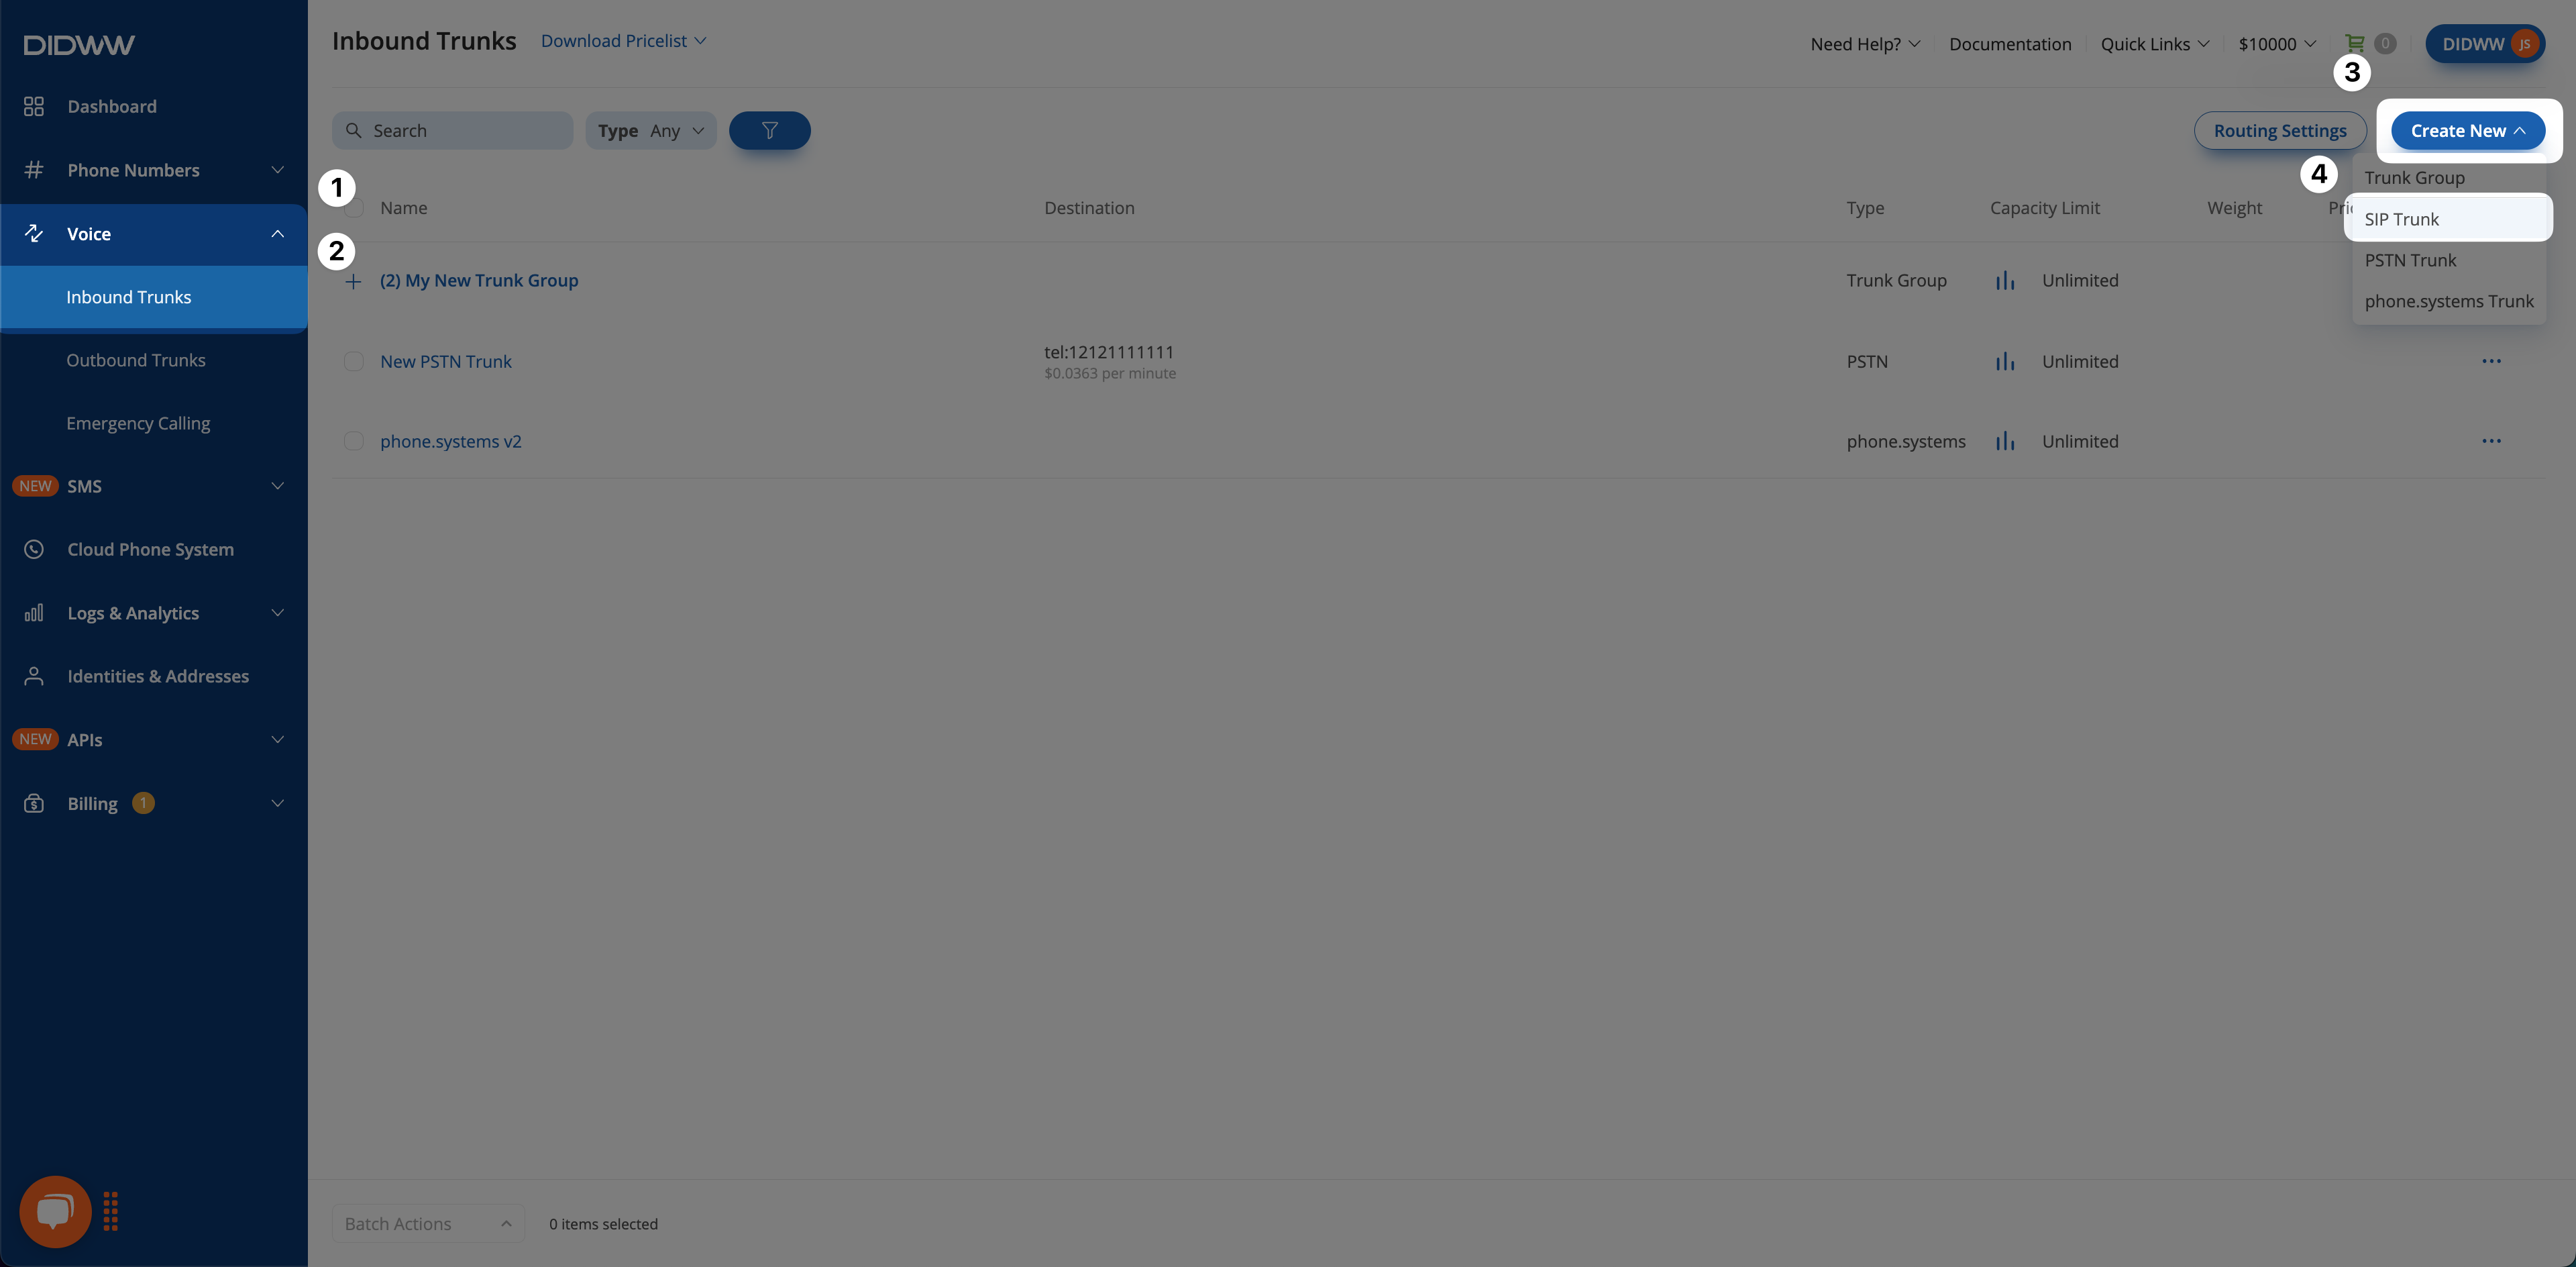](../../_images/create-inbound-sip-trunk1.png)
Creating a new inbound SIP trunk.
### Step 2: Configure general SIP trunk settings
In the Create Inbound SIP Trunk form, enter the settings for the selected
trunk type.
Static Endpoint
1. Enter a descriptive **Name** for the trunk (e.g., `FreeSWITCH`).
2. Select **Static Endpoint** as the trunk **Type**.
3. In **Host**, enter the public IP address of the FreeSWITCH server or a
domain name that resolves to it.
4. Select the signaling **Transport** and enter the corresponding
**Port** used by the external Sofia profile. The default profile uses
port `5080` for UDP or TCP and `5081` for TLS. If FreeSWITCH uses
a custom listening port, enter that port instead.
5. Set **User Part of R-URI** to `{DID}`. This placeholder inserts the
called DID in E.164 format into the user part of the Request-URI.
[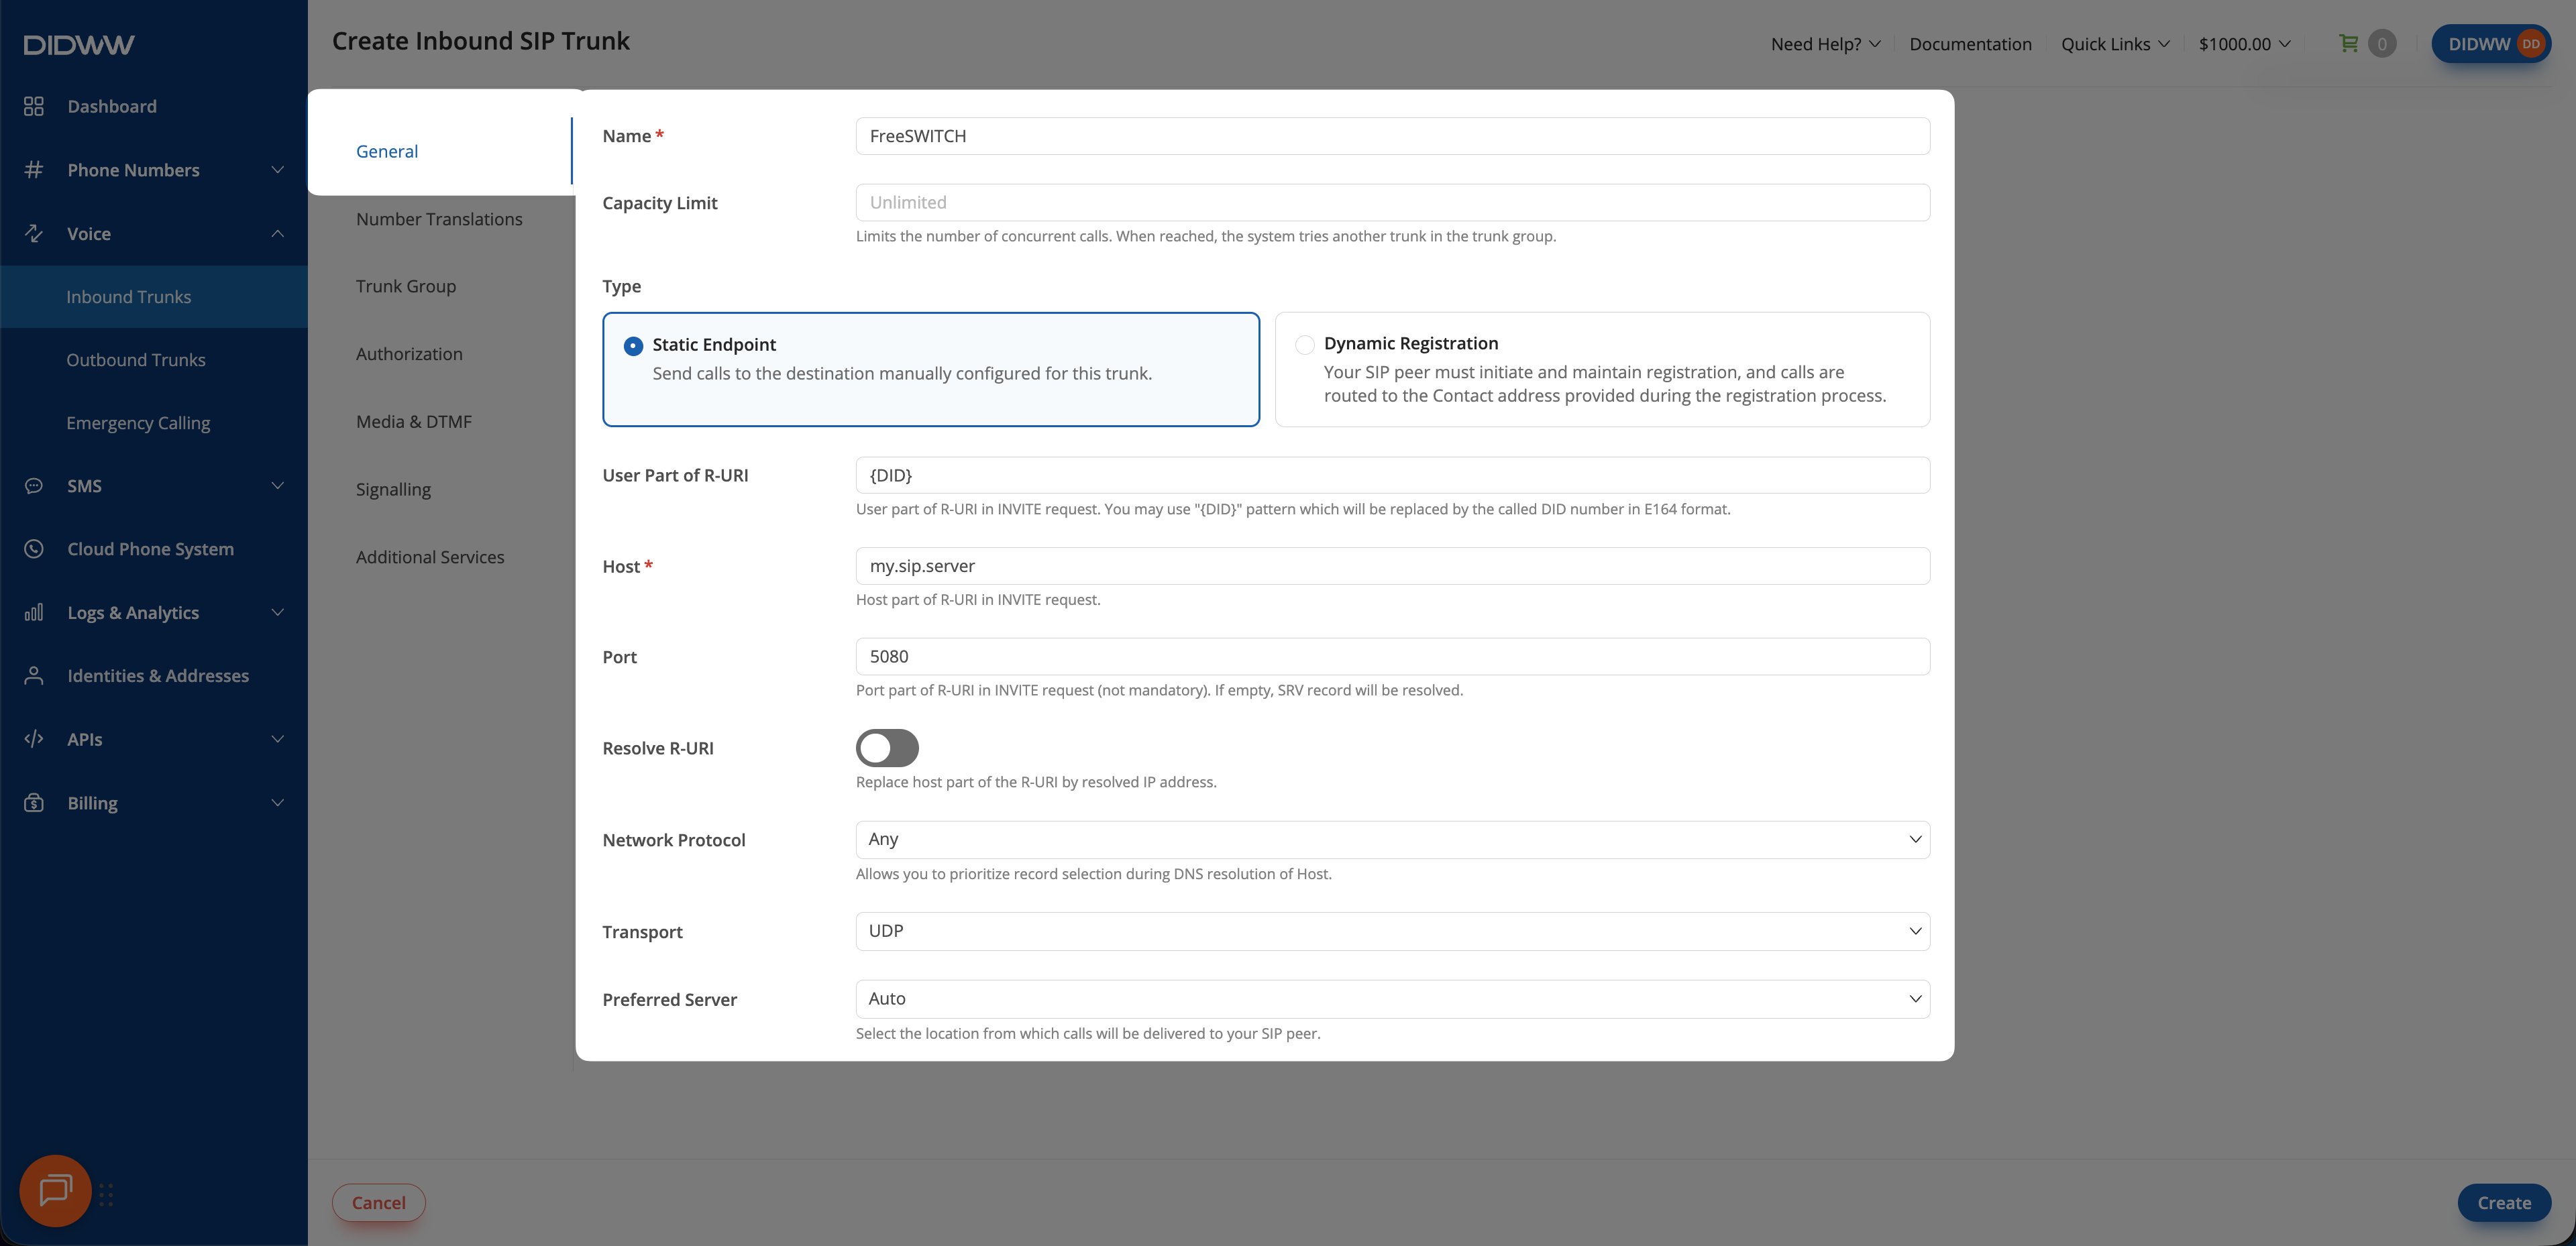](../../_images/configure-static-endpoint1.webp)
Static Endpoint trunk settings.
Dynamic Registration
1. Enter a descriptive **Name** for the trunk (e.g., `FreeSWITCH`).
2. Select **Dynamic Registration** as the trunk **Type**.
3. Configure the remaining media and signaling settings required by your
deployment.
Important
The Dynamic Registration setup in this guide sends all incoming calls
to one FreeSWITCH destination. It does not configure DID-based routing
for Dynamic Registration. The Static Endpoint example in this guide
routes calls by DID.
[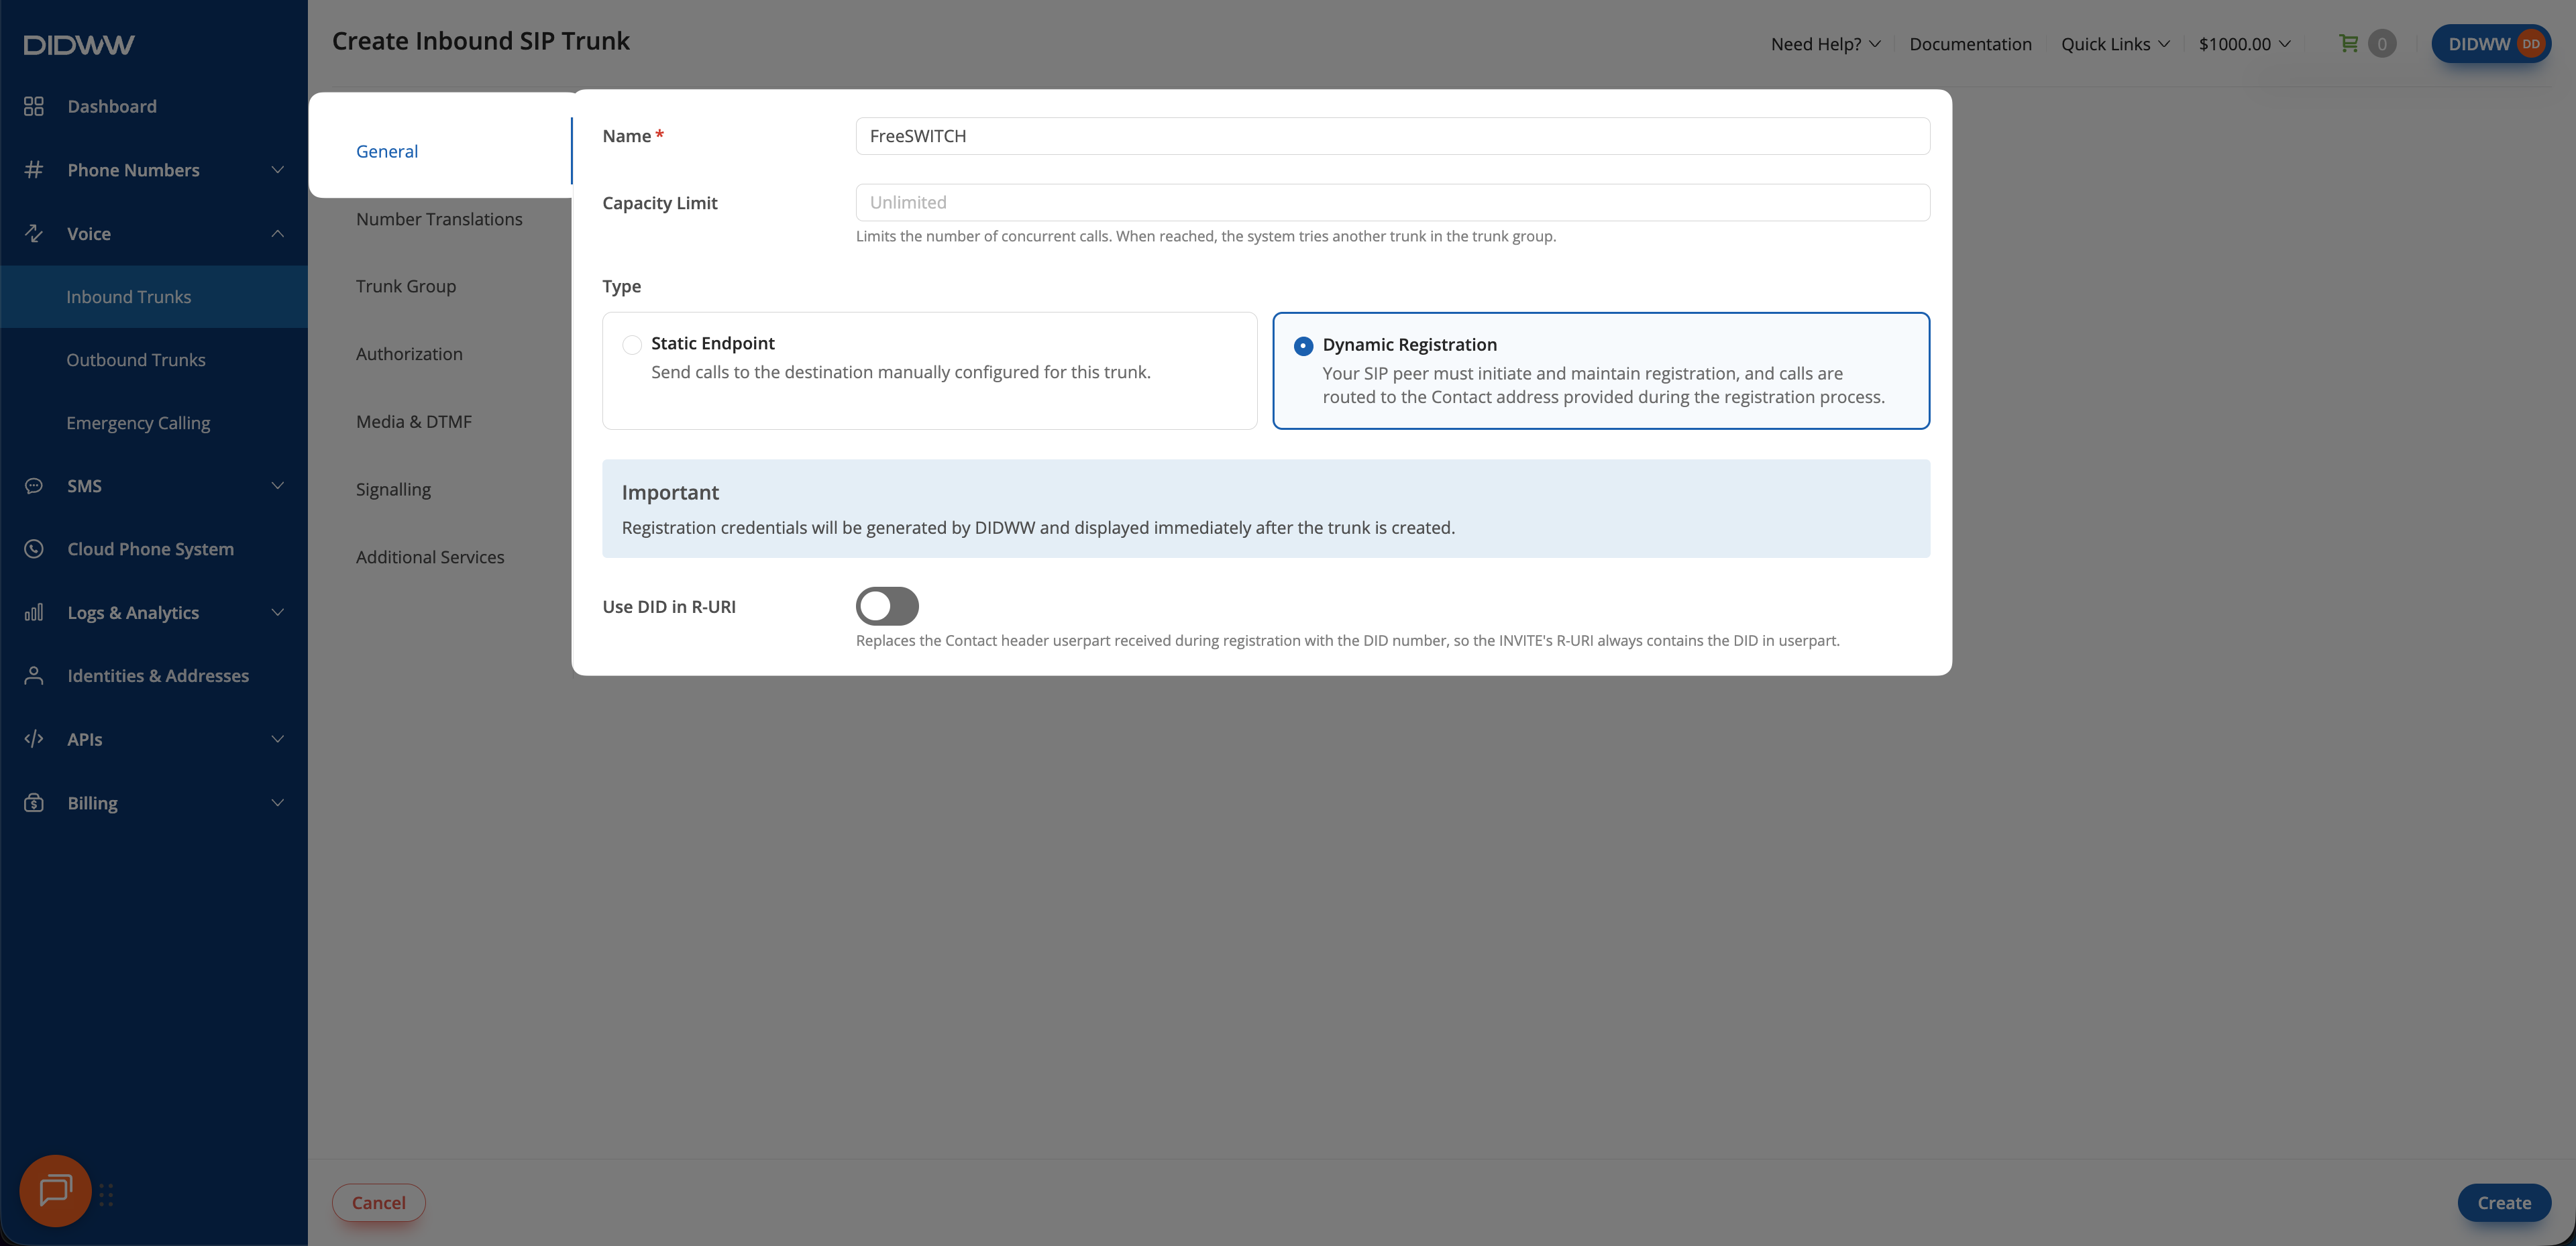](../../_images/configure-dynamic-registration1.webp)
Dynamic Registration trunk settings.
### Step 3: Click Create and Save Inbound SIP Trunk Configuration
When all required fields in the Create Inbound SIP Trunk form are filled,
click **Create** to save the trunk.
Note
For advanced SIP trunk configuration, see
[Advanced Inbound SIP Trunk documentation](../../voice/inbound-trunks/creating-a-new-sip-trunk.html#user-panel-sipin-trunk-advanced-configuration).
Static Endpoint
[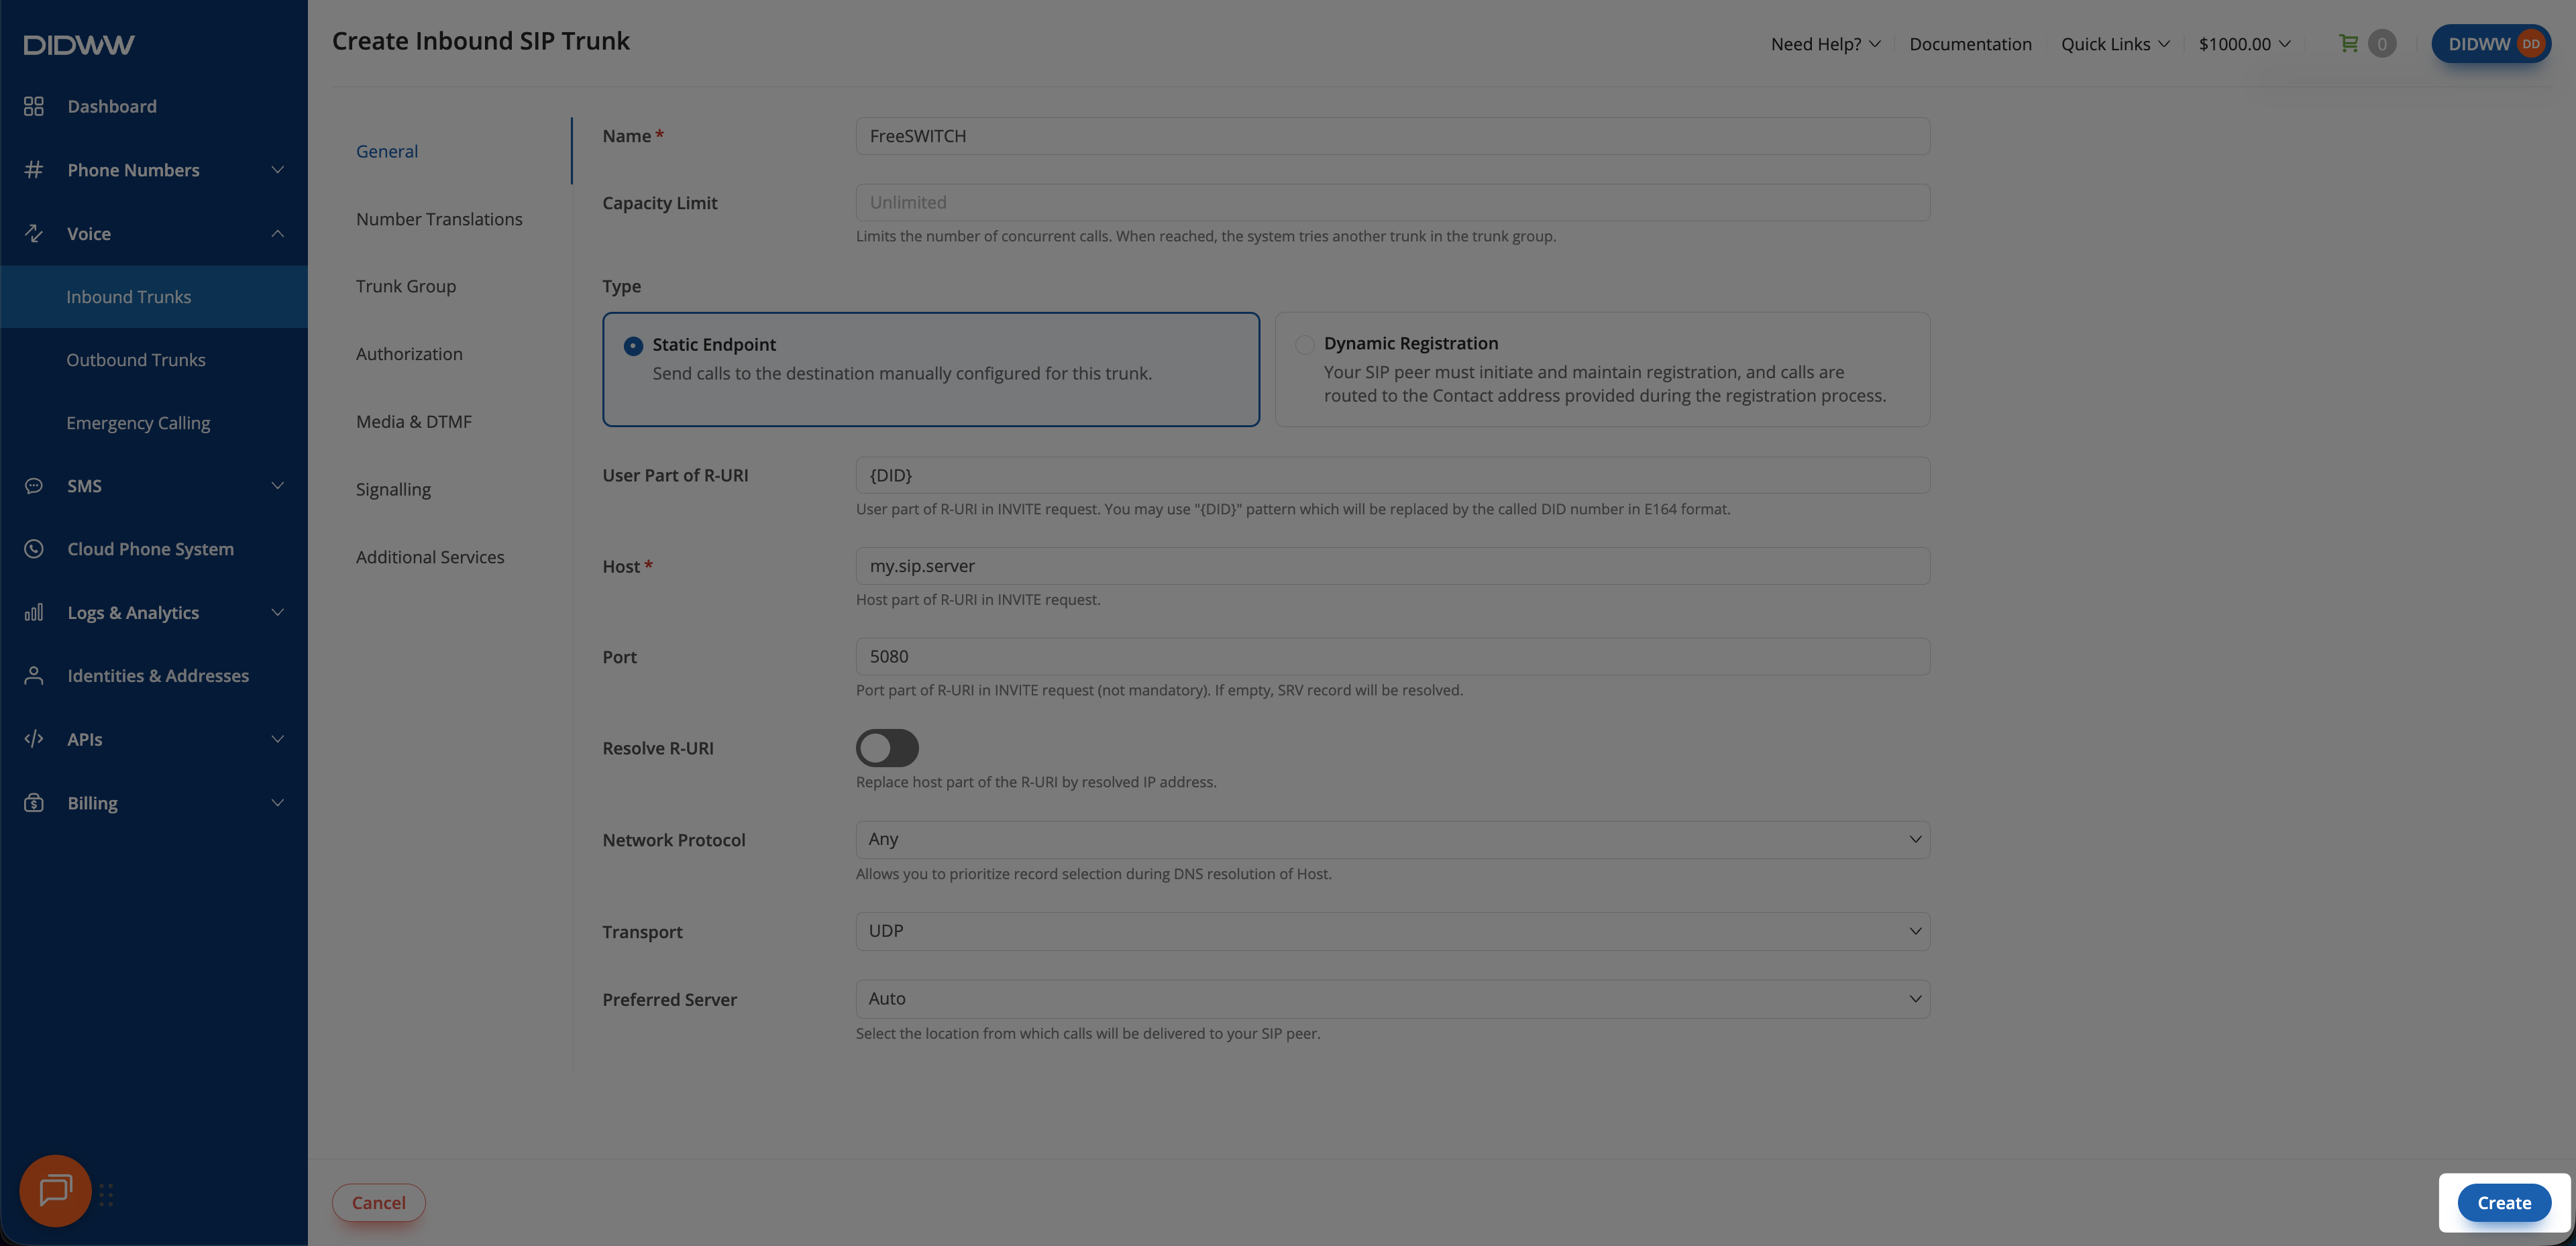](../../_images/save-static-inbound-trunk1.webp)
Creating the Static Endpoint inbound SIP trunk.
Dynamic Registration
[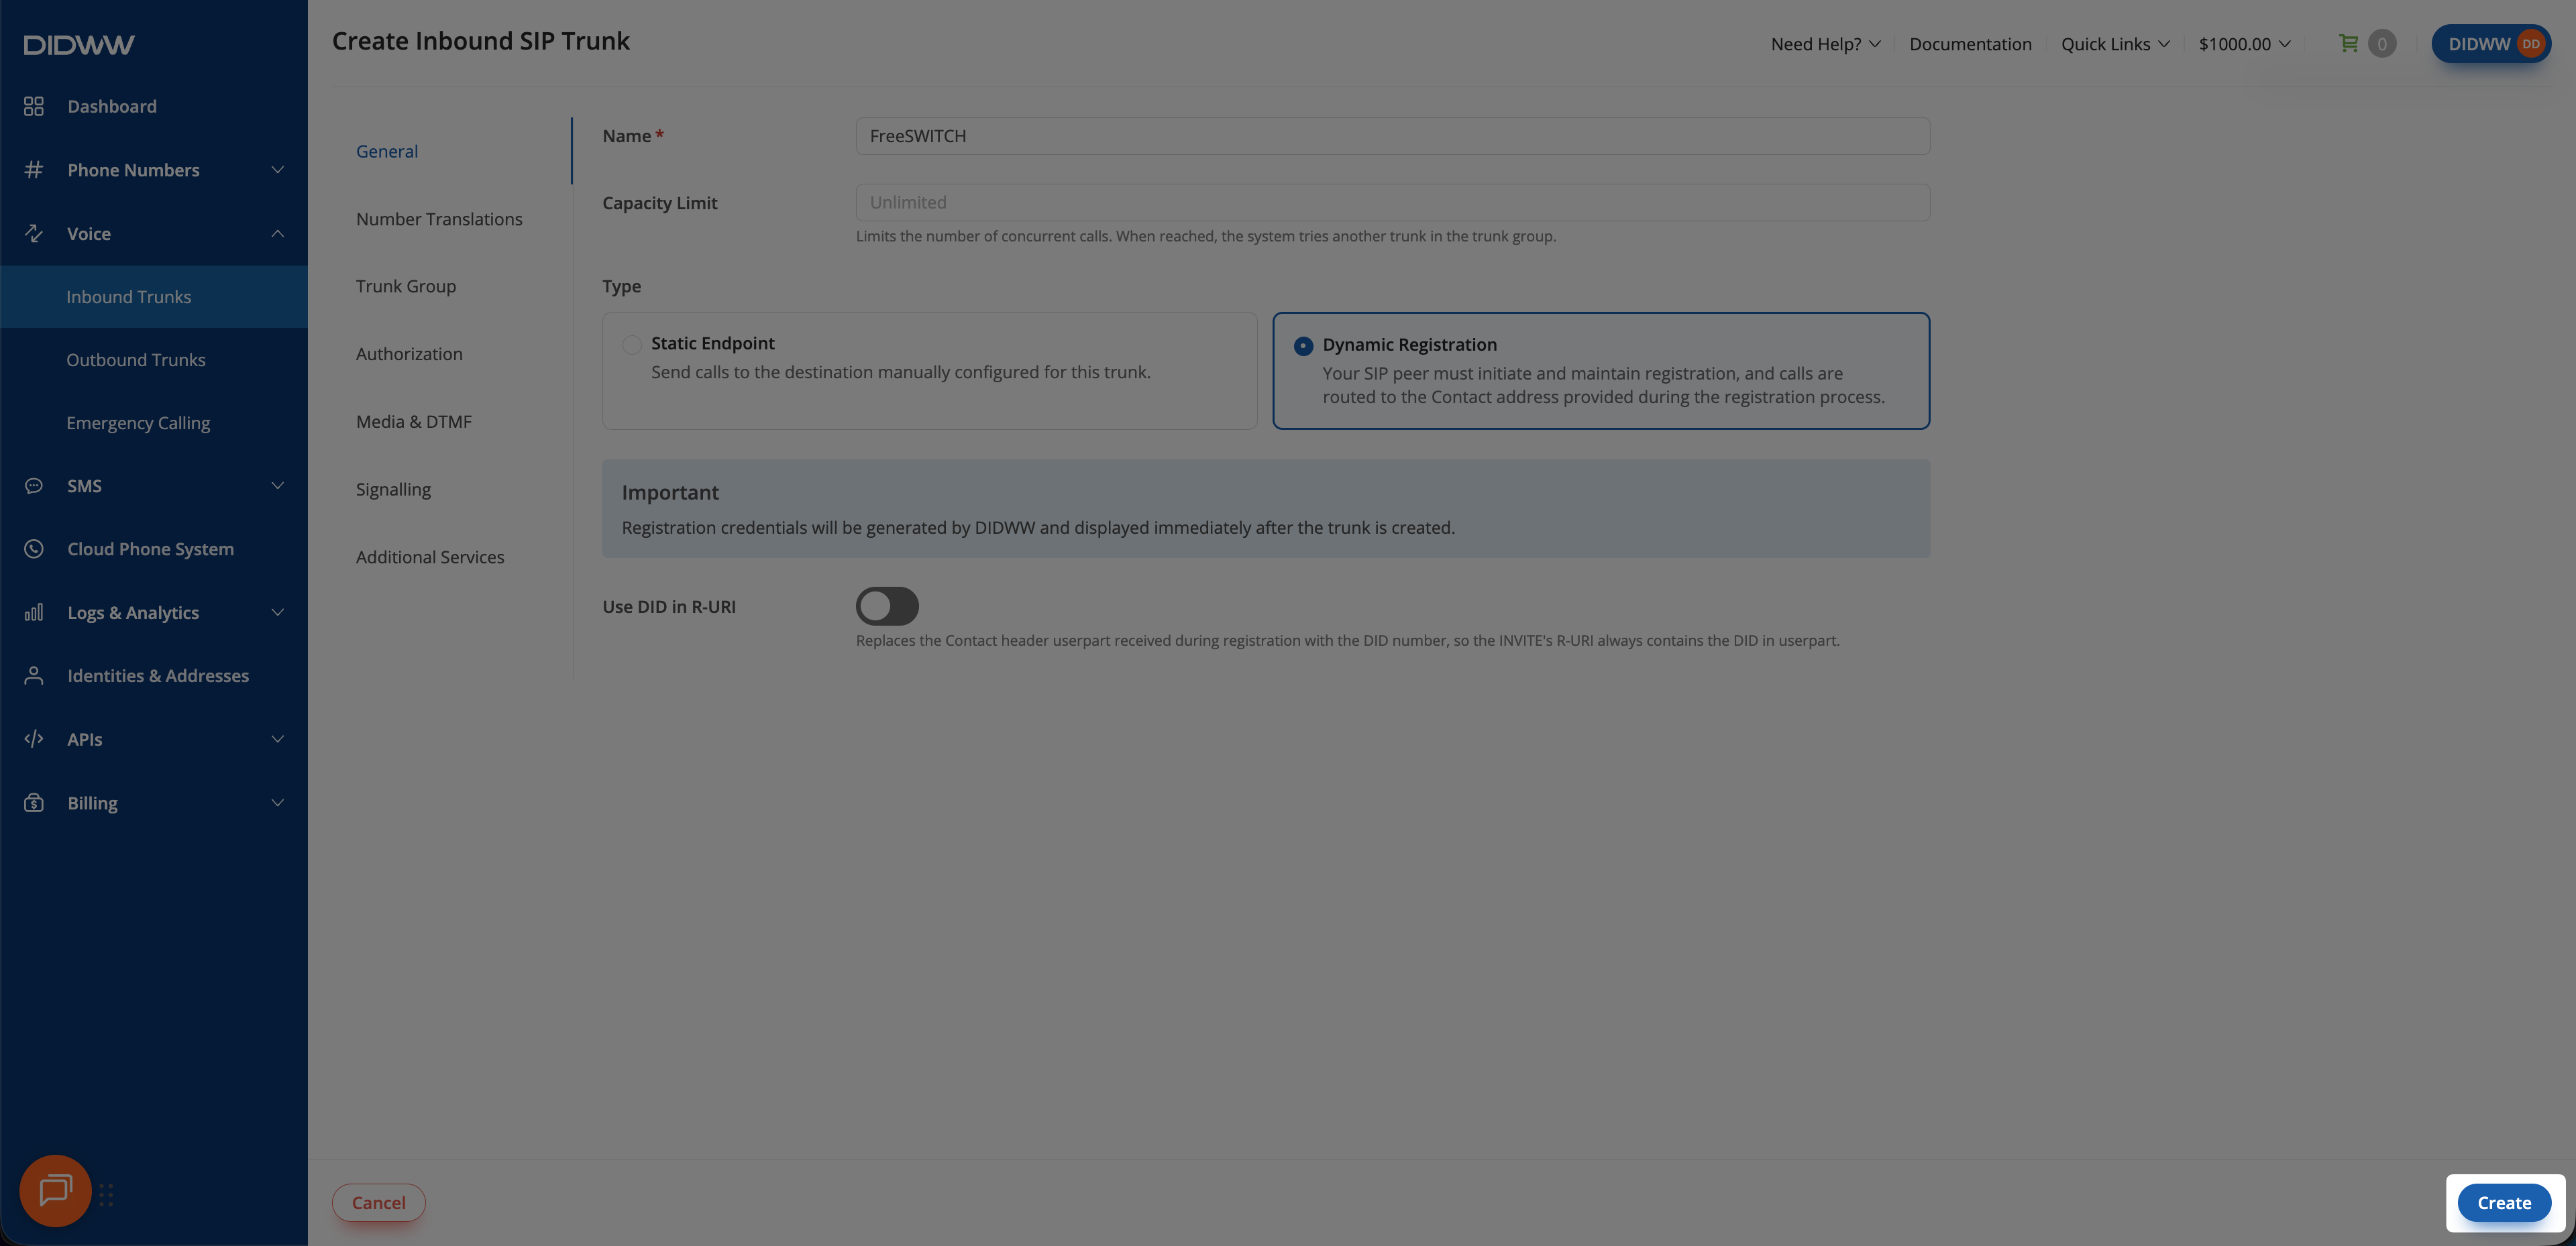](../../_images/save-dynamic-inbound-trunk1.webp)
Creating the Dynamic Registration inbound SIP trunk.
### Step 4: Copy Inbound Trunk Credentials (Dynamic Registration Only)
For a Dynamic Registration trunk, open the created trunk and copy its
generated username, password, and registration endpoint. You will use these
values when you [configure the FreeSWITCH inbound gateway](#freeswitch-configure-inbound-gateway). Static Endpoint
trunks do not use
registration credentials.
[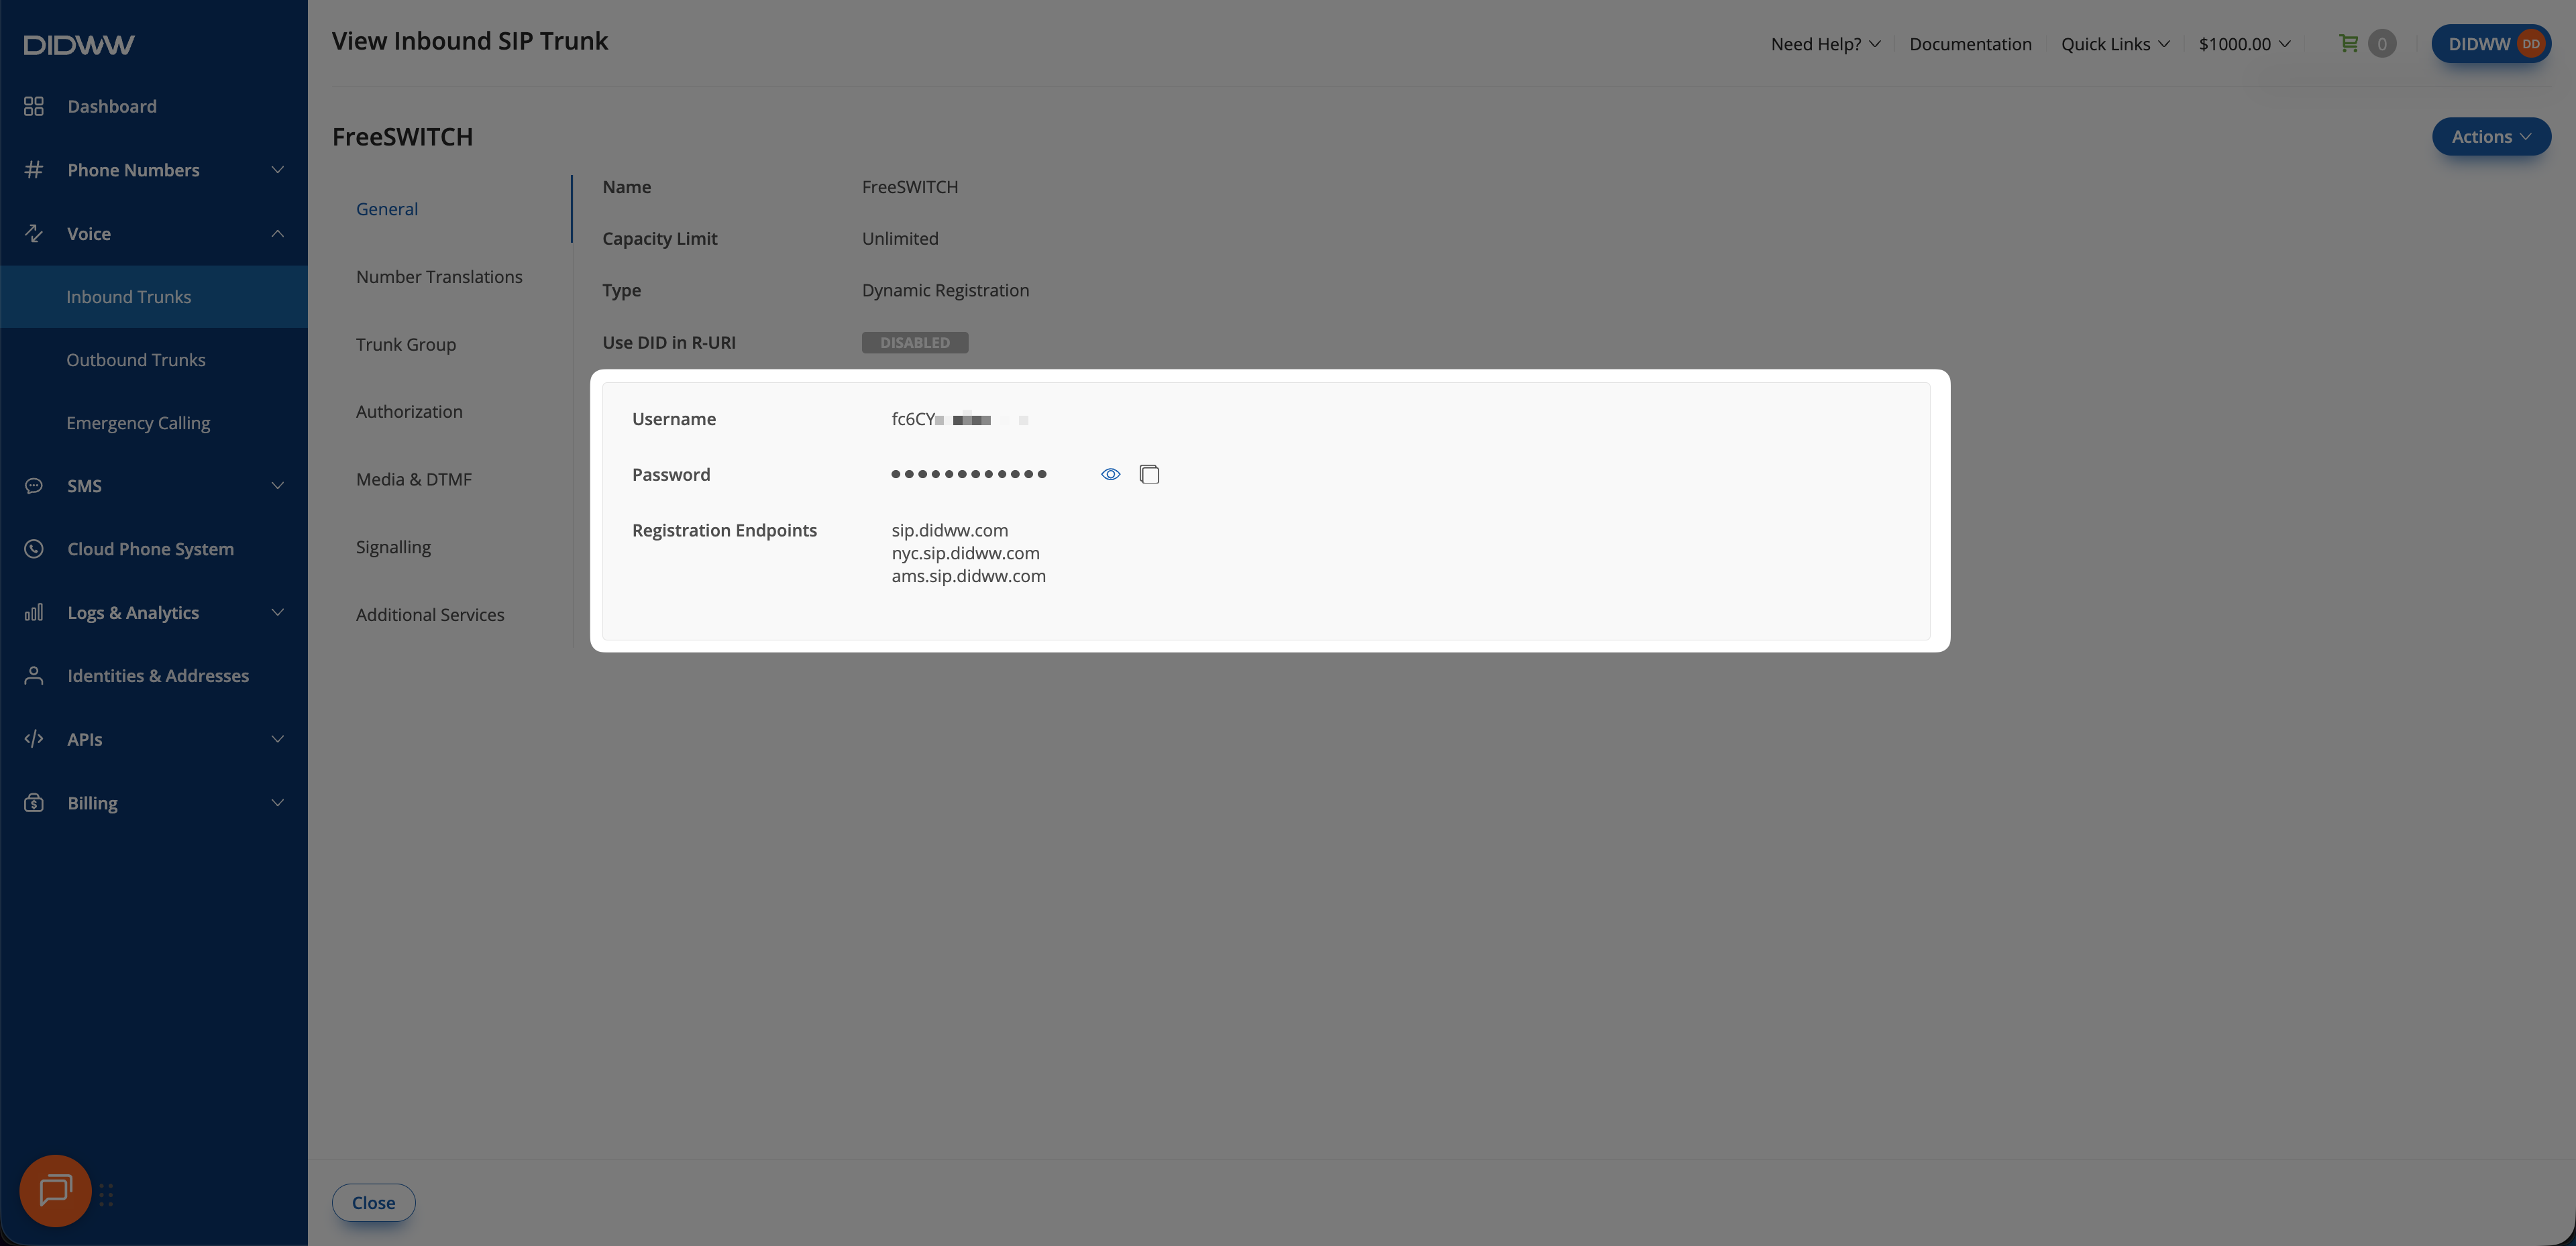](../../_images/inbound-registration-credentials1.webp)
Dynamic Registration credentials and endpoints.
### Step 5: Assign inbound SIP trunk to your DID numbers
After creating the Inbound SIP Trunk for FreeSWITCH, assign it to the DID
number(s) that will deliver incoming calls to FreeSWITCH.
1. In the DIDWW User Panel, go to **Phone Numbers > My Numbers**.
2. Select the DID number(s) you want to assign to the inbound SIP trunk.
3. At the bottom of the page, click **Batch Actions > Update Trunks**.
[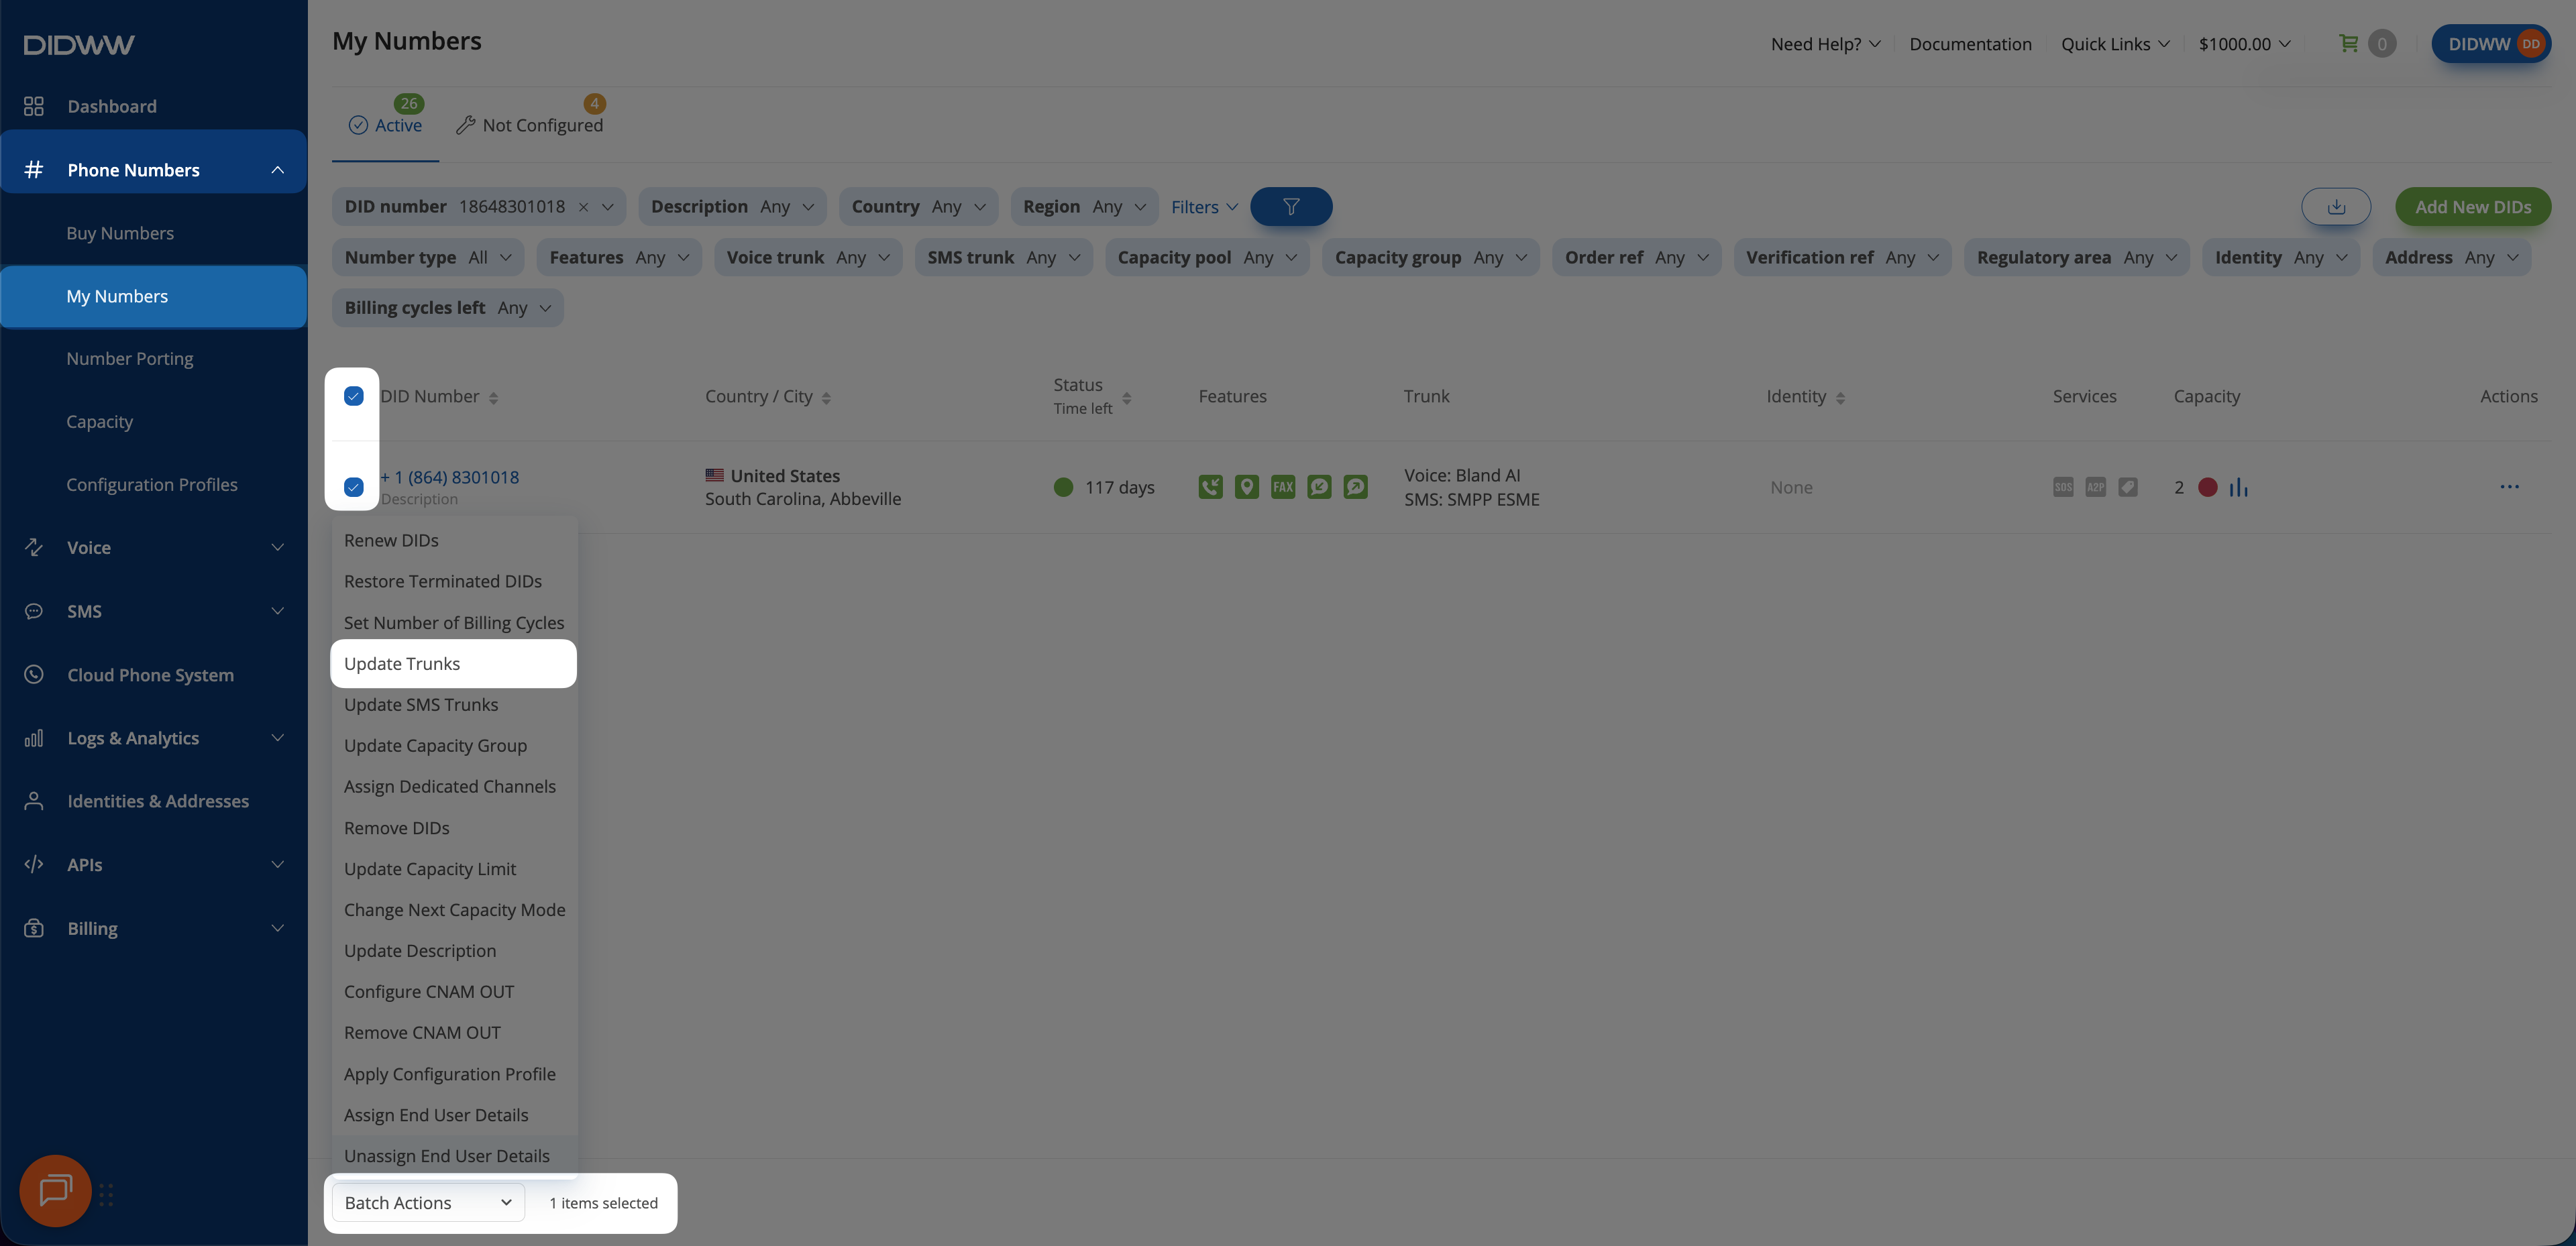](../../_images/select-dids-update-trunks1.webp)
Selecting **Update Trunks** from the Batch Actions menu.
4. From the dropdown menu, choose the **FreeSWITCH SIP trunk** created in
[Step 3](#freeswitch-save-inbound-trunk).
5. Click **Confirm** to apply the changes.
[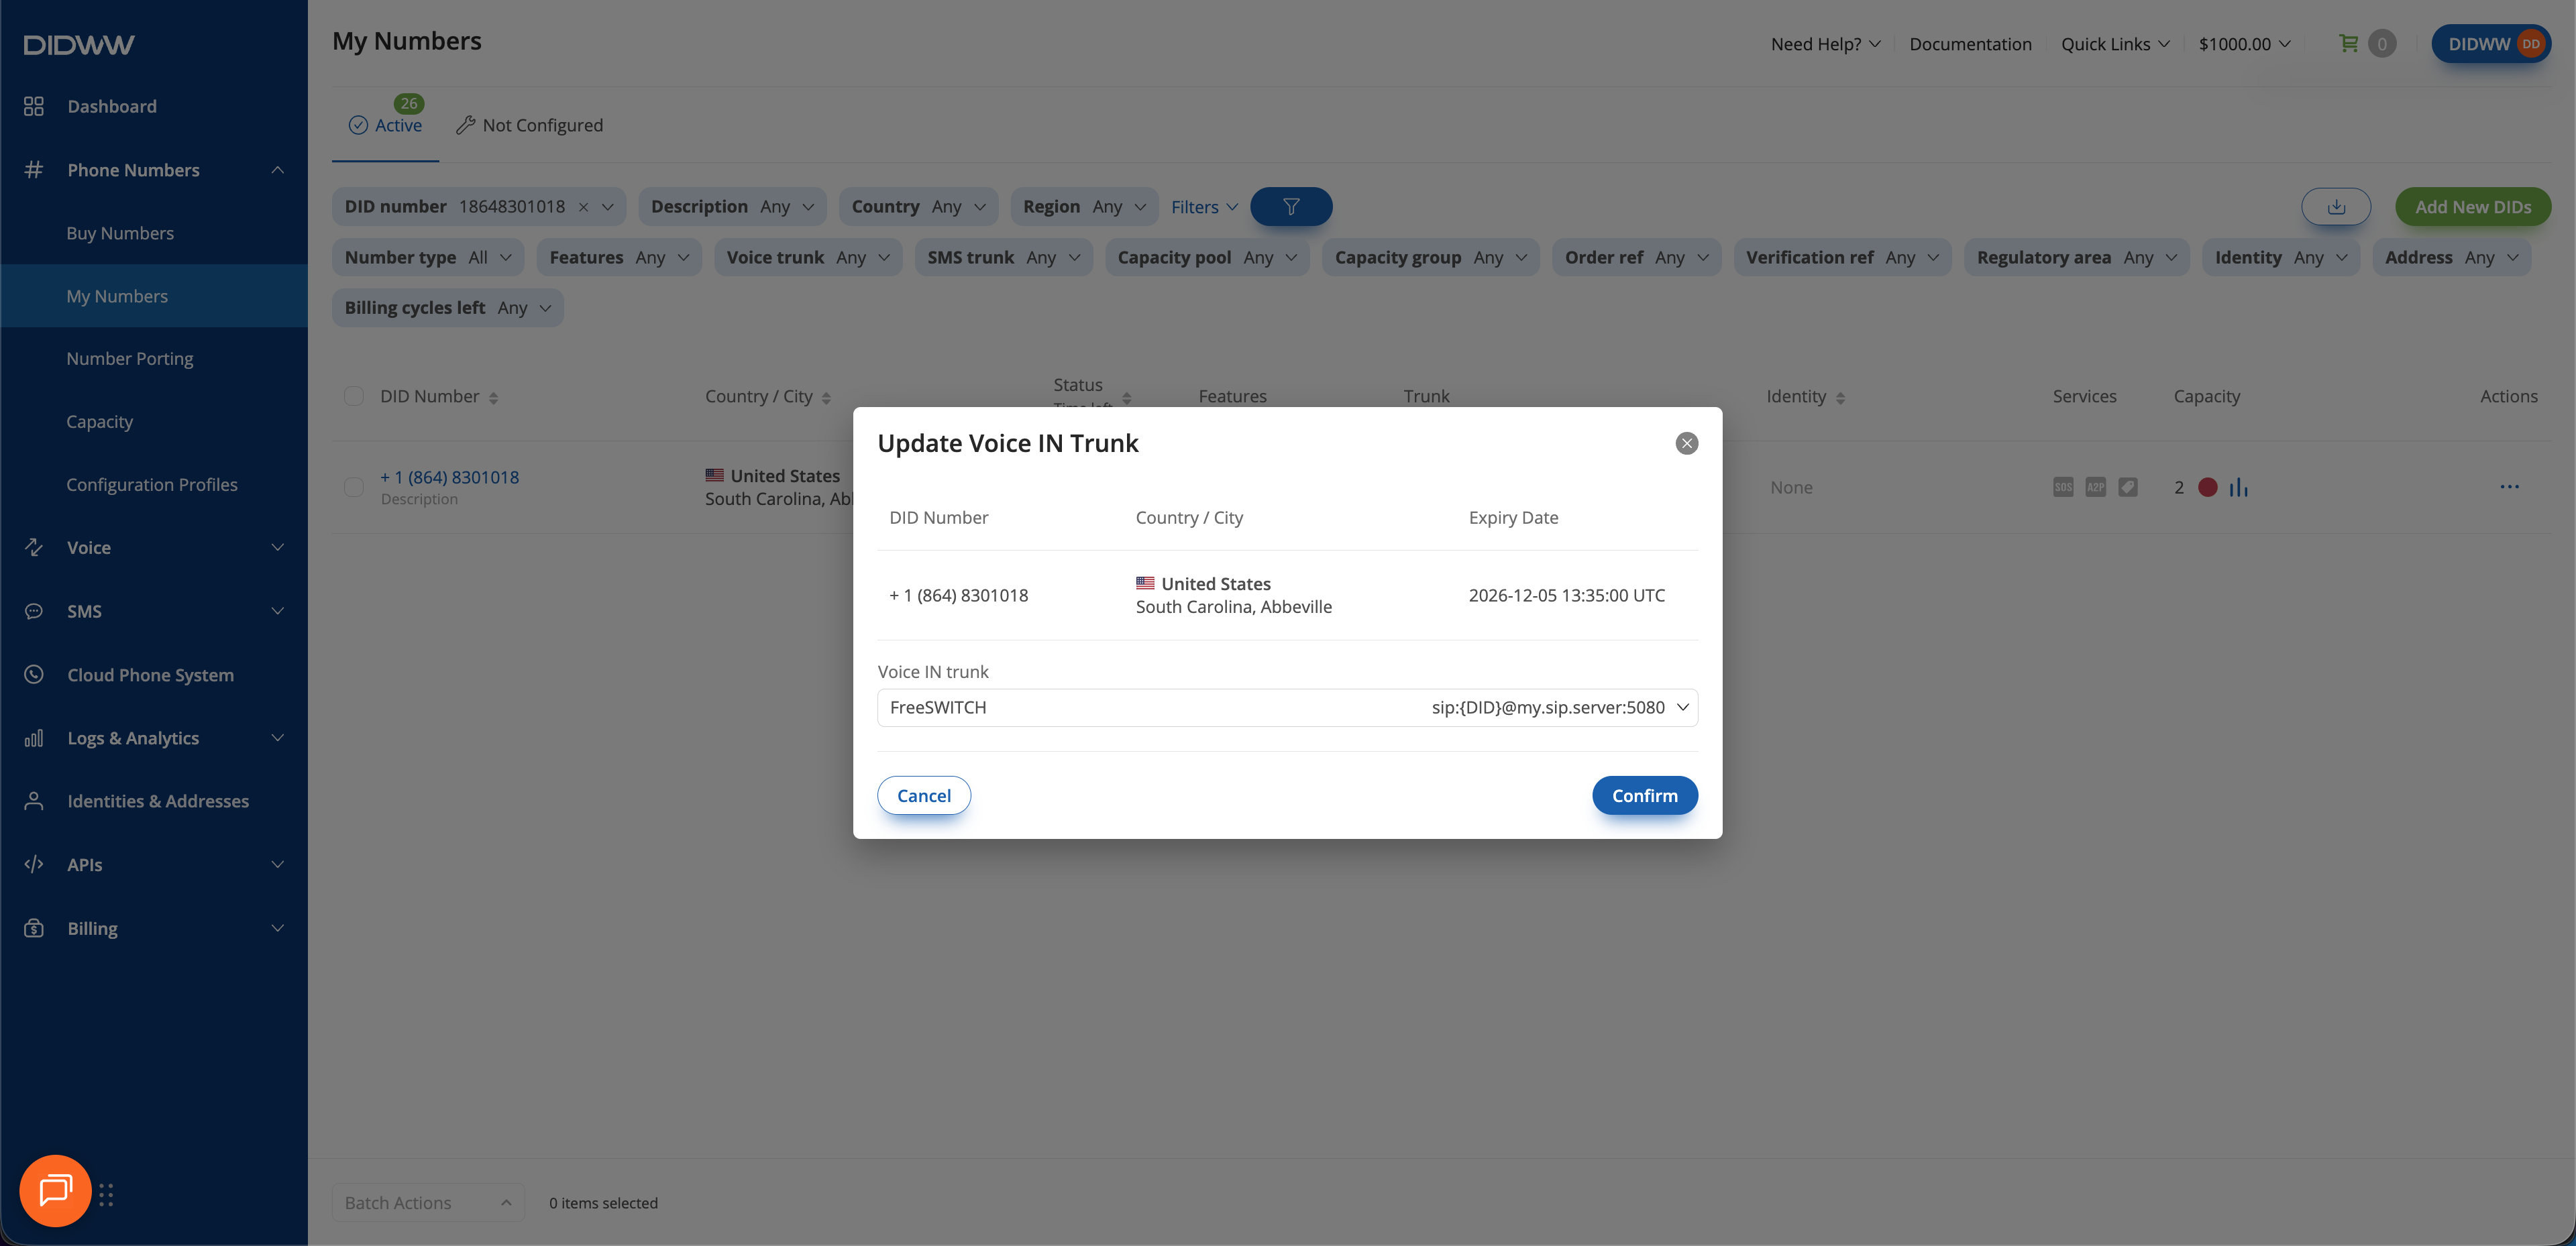](../../_images/assign-inbound-trunk1.webp)
Assigning the newly created SIP trunk to the selected DID(s).
---
## 2. Configure outbound voice trunk
Configure an Outbound SIP Trunk in the DIDWW User Panel to allow FreeSWITCH to
place outbound calls through DIDWW. This trunk provides the SIP credentials
and routing settings required for outbound calls to external phone numbers.
### Before you begin
Access to **DIDWW Outbound Trunks** is required for making outbound calls. See
[Get access to outbound trunks](../../voice/outbound-trunks/get-access.html#user-panel-voice-out-get-access).
### Step 1: Create New Outbound SIP Trunk
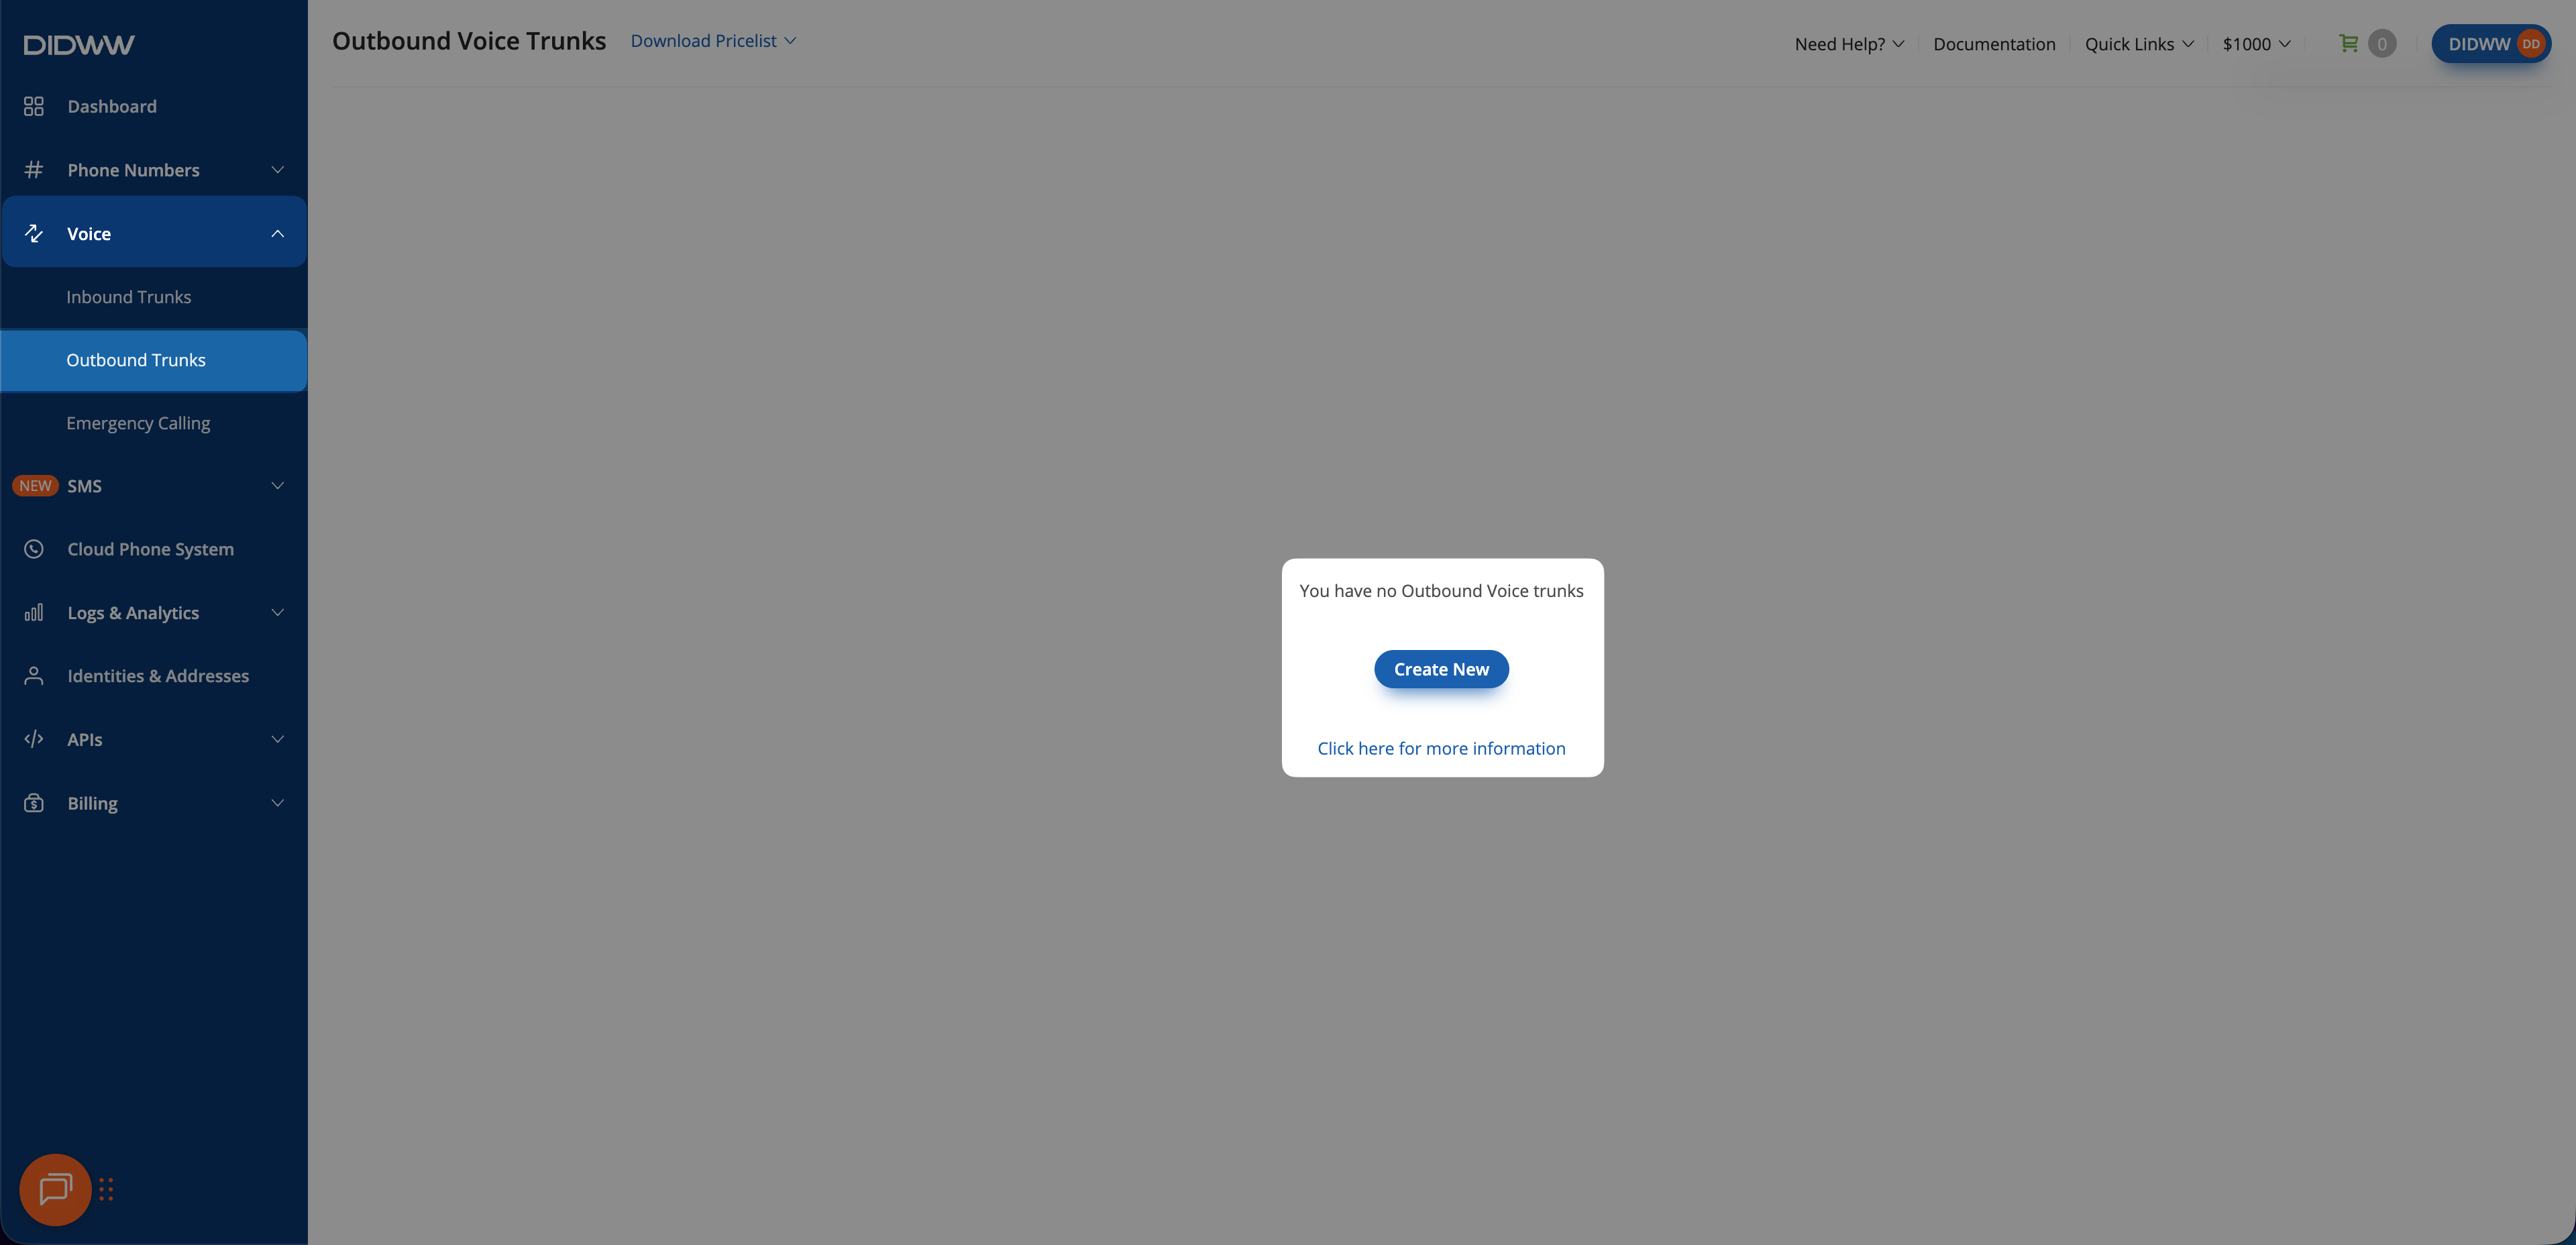
1. In the [DIDWW User Panel](https://my.didww.com/#/trunks), go to
**Voice > Outbound Trunks**.
2. Click **Create New**.
[](../../_images/create-outbound-sip-trunk1.png)
Creating a new outbound SIP trunk.
### Step 2: Configure Authentication
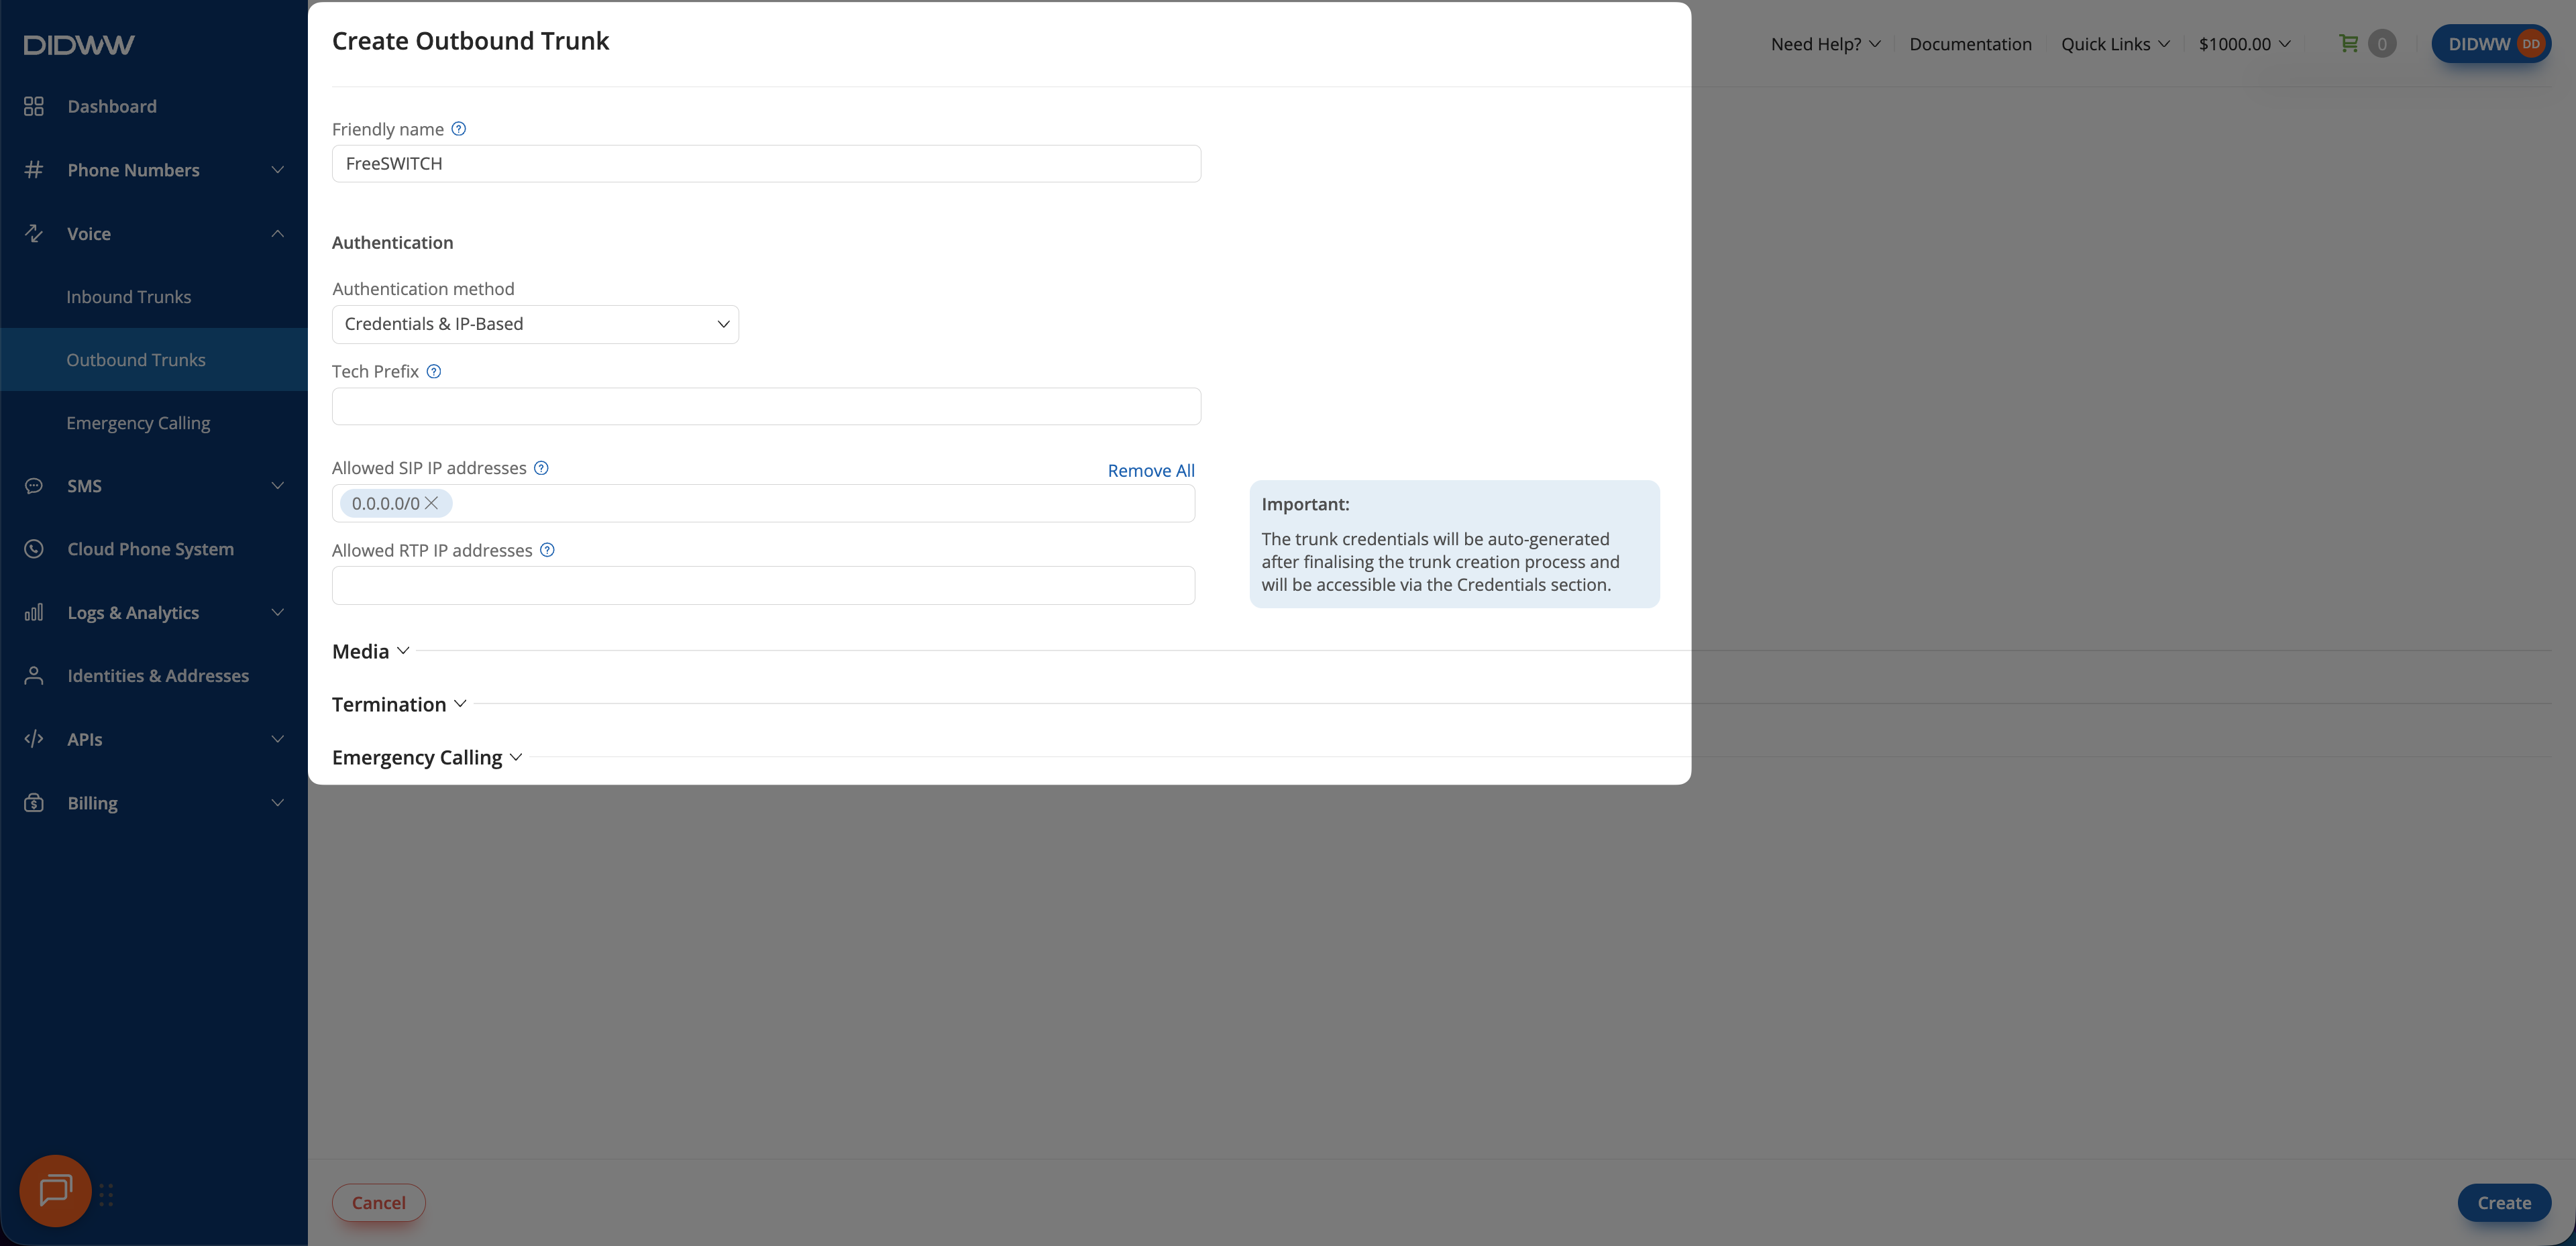
1. Update the **Friendly Name** (e.g., `FreeSWITCH`).
2. Keep the default **Credentials & IP-Based** authentication method selected.
The SIP digest credentials (username and password) will be provided after
the trunk is created.
3. In **Allowed SIP IP addresses**, enter the public IP address or subnet from
which FreeSWITCH will send outbound SIP traffic.
4. Configure **Allowed CLI(s)** and the other termination settings required by
your deployment.
Note
Make sure you add the correct public IP address or subnet so that outbound
calls are accepted by DIDWW.
[](../../_images/configure-outbound-trunk1.webp)
Entering allowed SIP IP addresses for outbound authentication.
### Step 3: Click Create and Save Outbound SIP Trunk Configuration
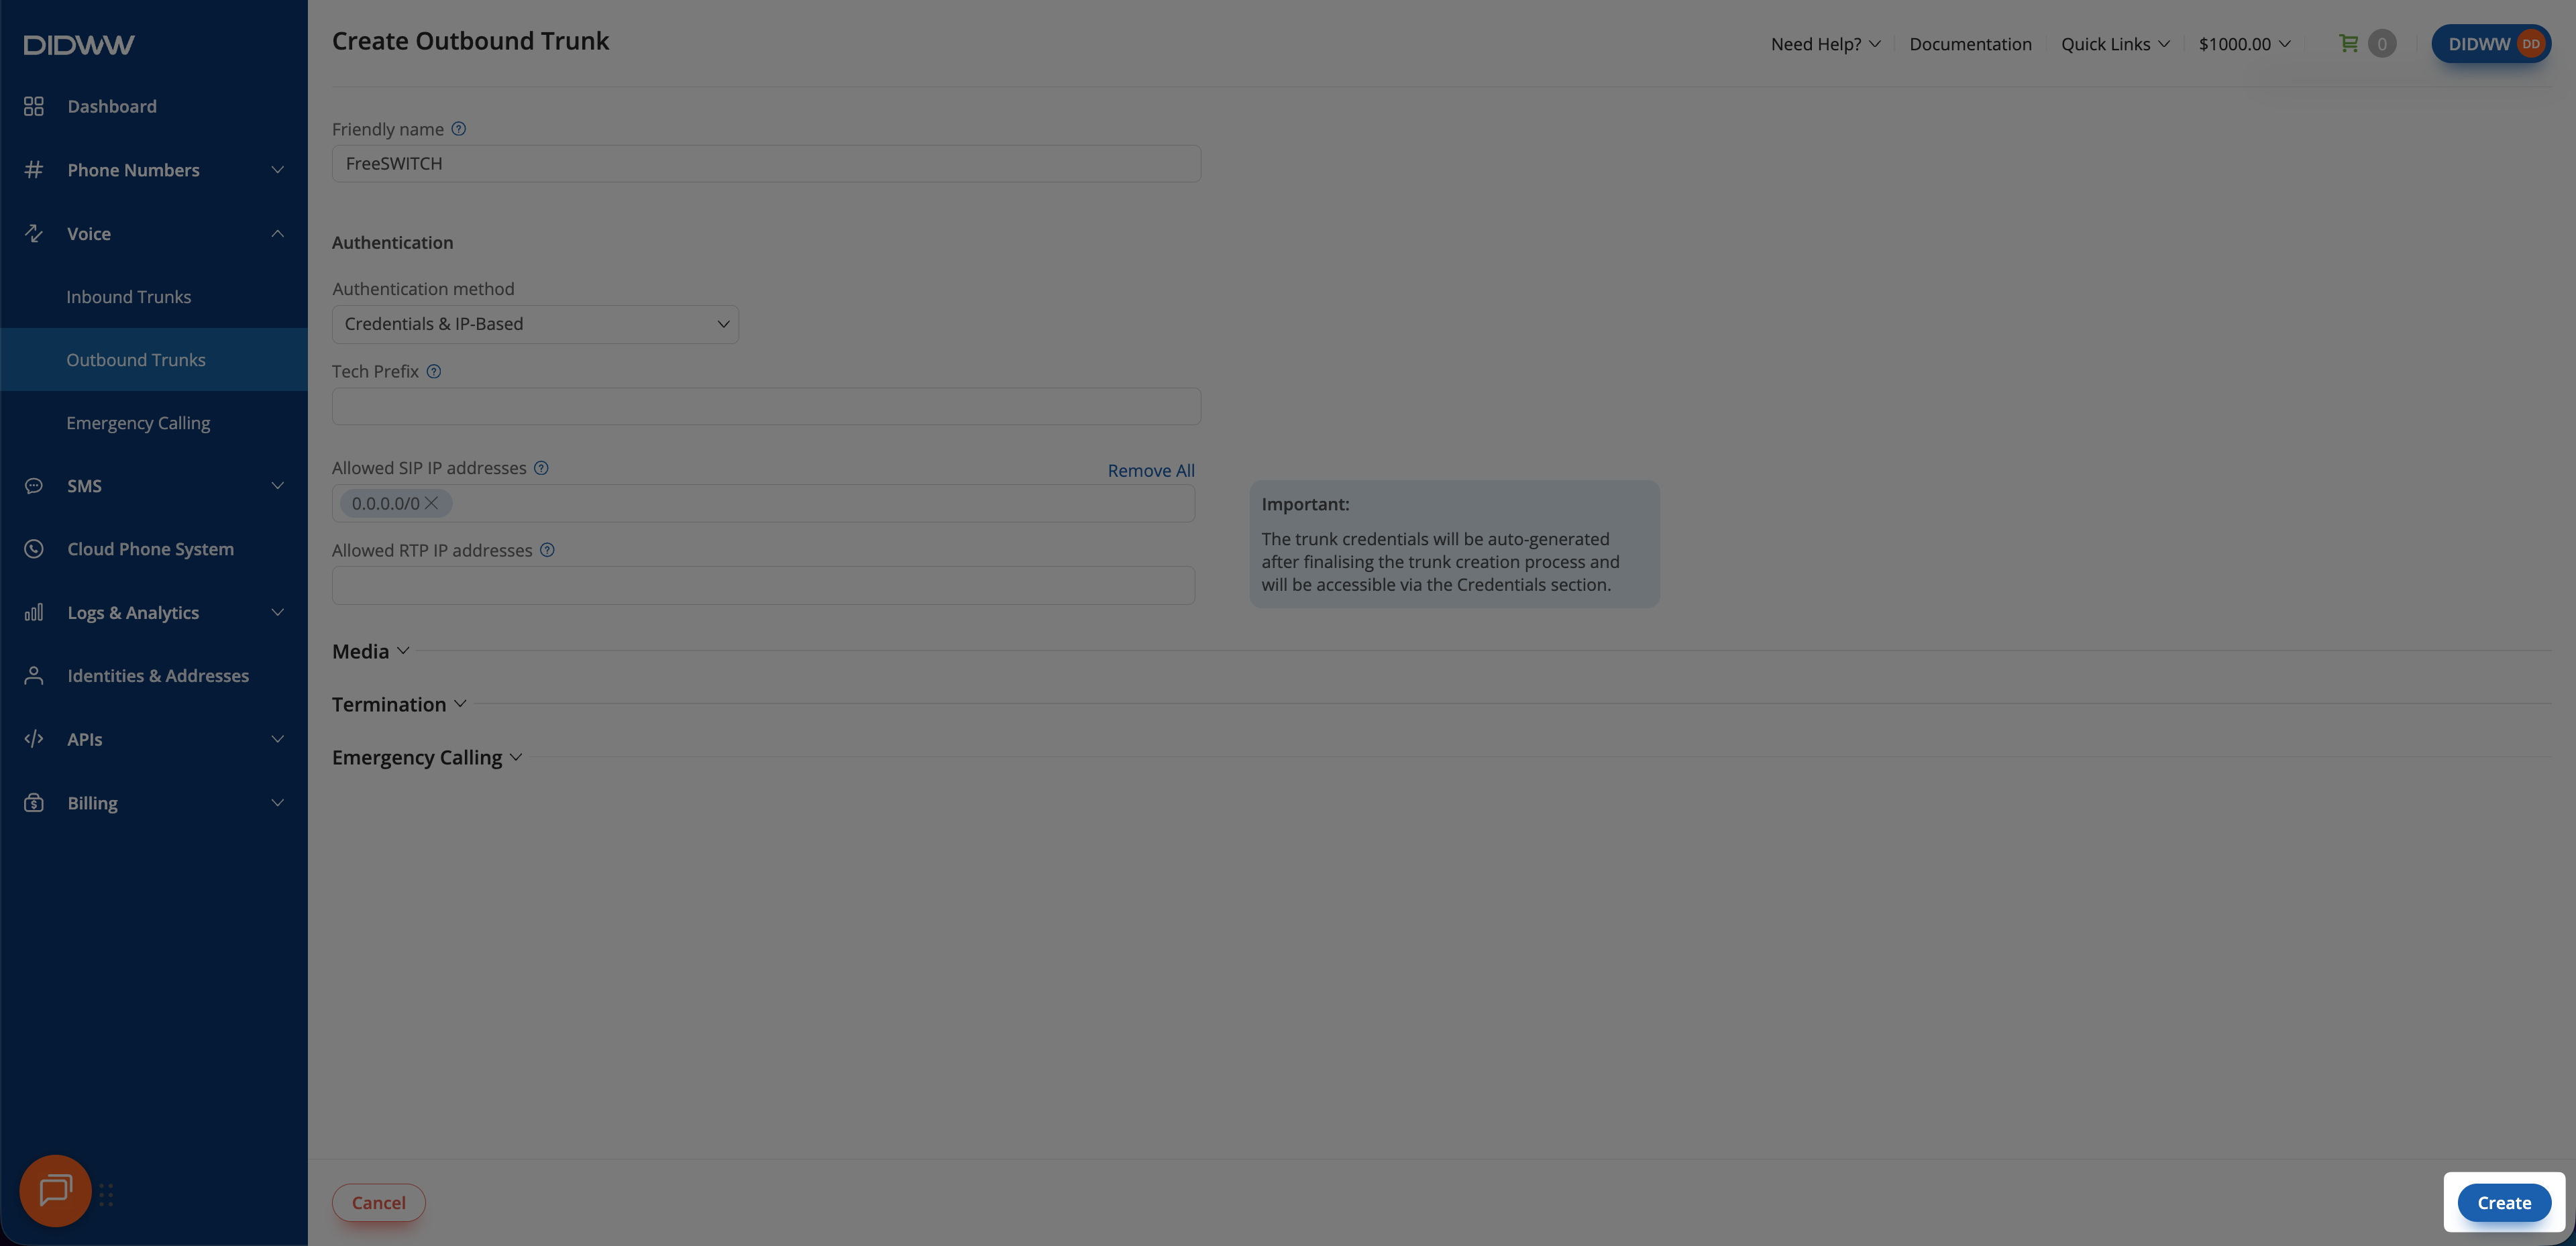
When all required fields in the Create Outbound SIP Trunk are filled, click
**Create** to save your outbound SIP trunk.
Note
For advanced outbound SIP trunk configuration, see
[Outbound SIP Trunk Guide](../../voice/outbound-trunks/how-to-guides/index.html#outbound-trunk-create).
[](../../_images/save-outbound-trunk1.webp)
Outbound SIP trunk created and ready for use.
### Step 4: View Outbound Trunk Credentials
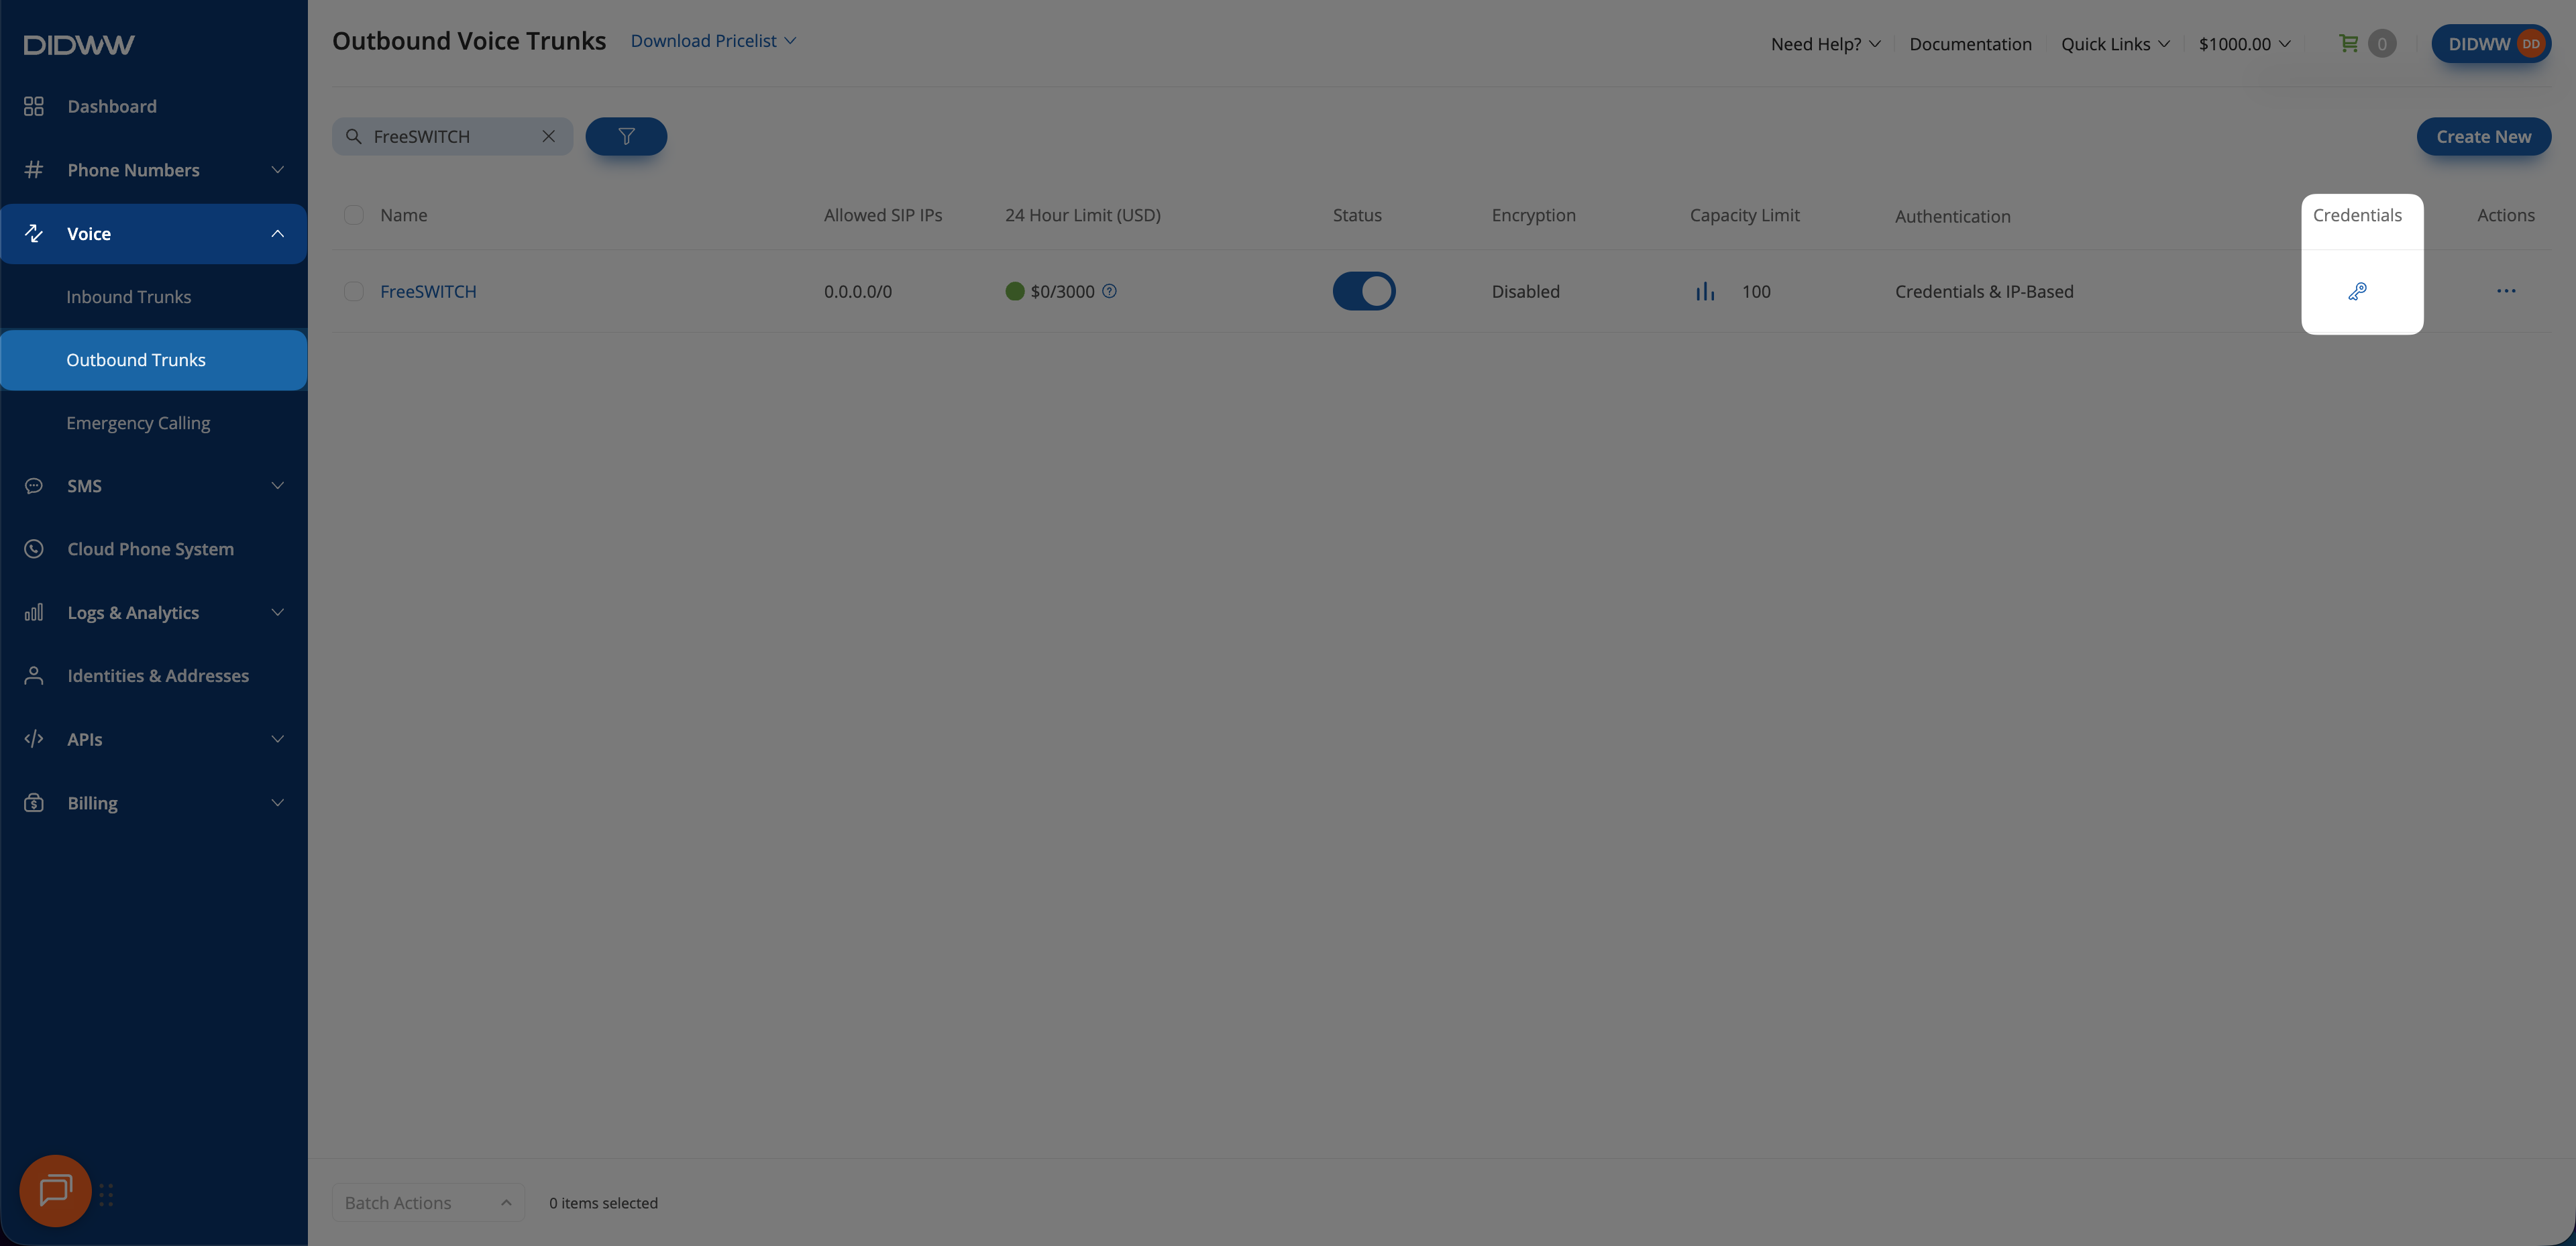
After the outbound trunk is created, you can view its credentials by selecting
the key icon in the Credentials column on the Outbound Trunks page.
1. Go to **Voice > Outbound Trunks**.
2. Locate your outbound trunk and click the **key icon** in the **Credentials**
column.
[](../../_images/open-outbound-trunk-credentials1.webp)
Opening the FreeSWITCH outbound trunk credentials.
3. The trunk credentials will appear, showing the **Username** and **Password**
(click the **eye icon** to reveal the password).
4. Copy and securely store these credentials. You will need them when you
[configure the FreeSWITCH outbound gateway](#freeswitch-configure-outbound-gateway).
[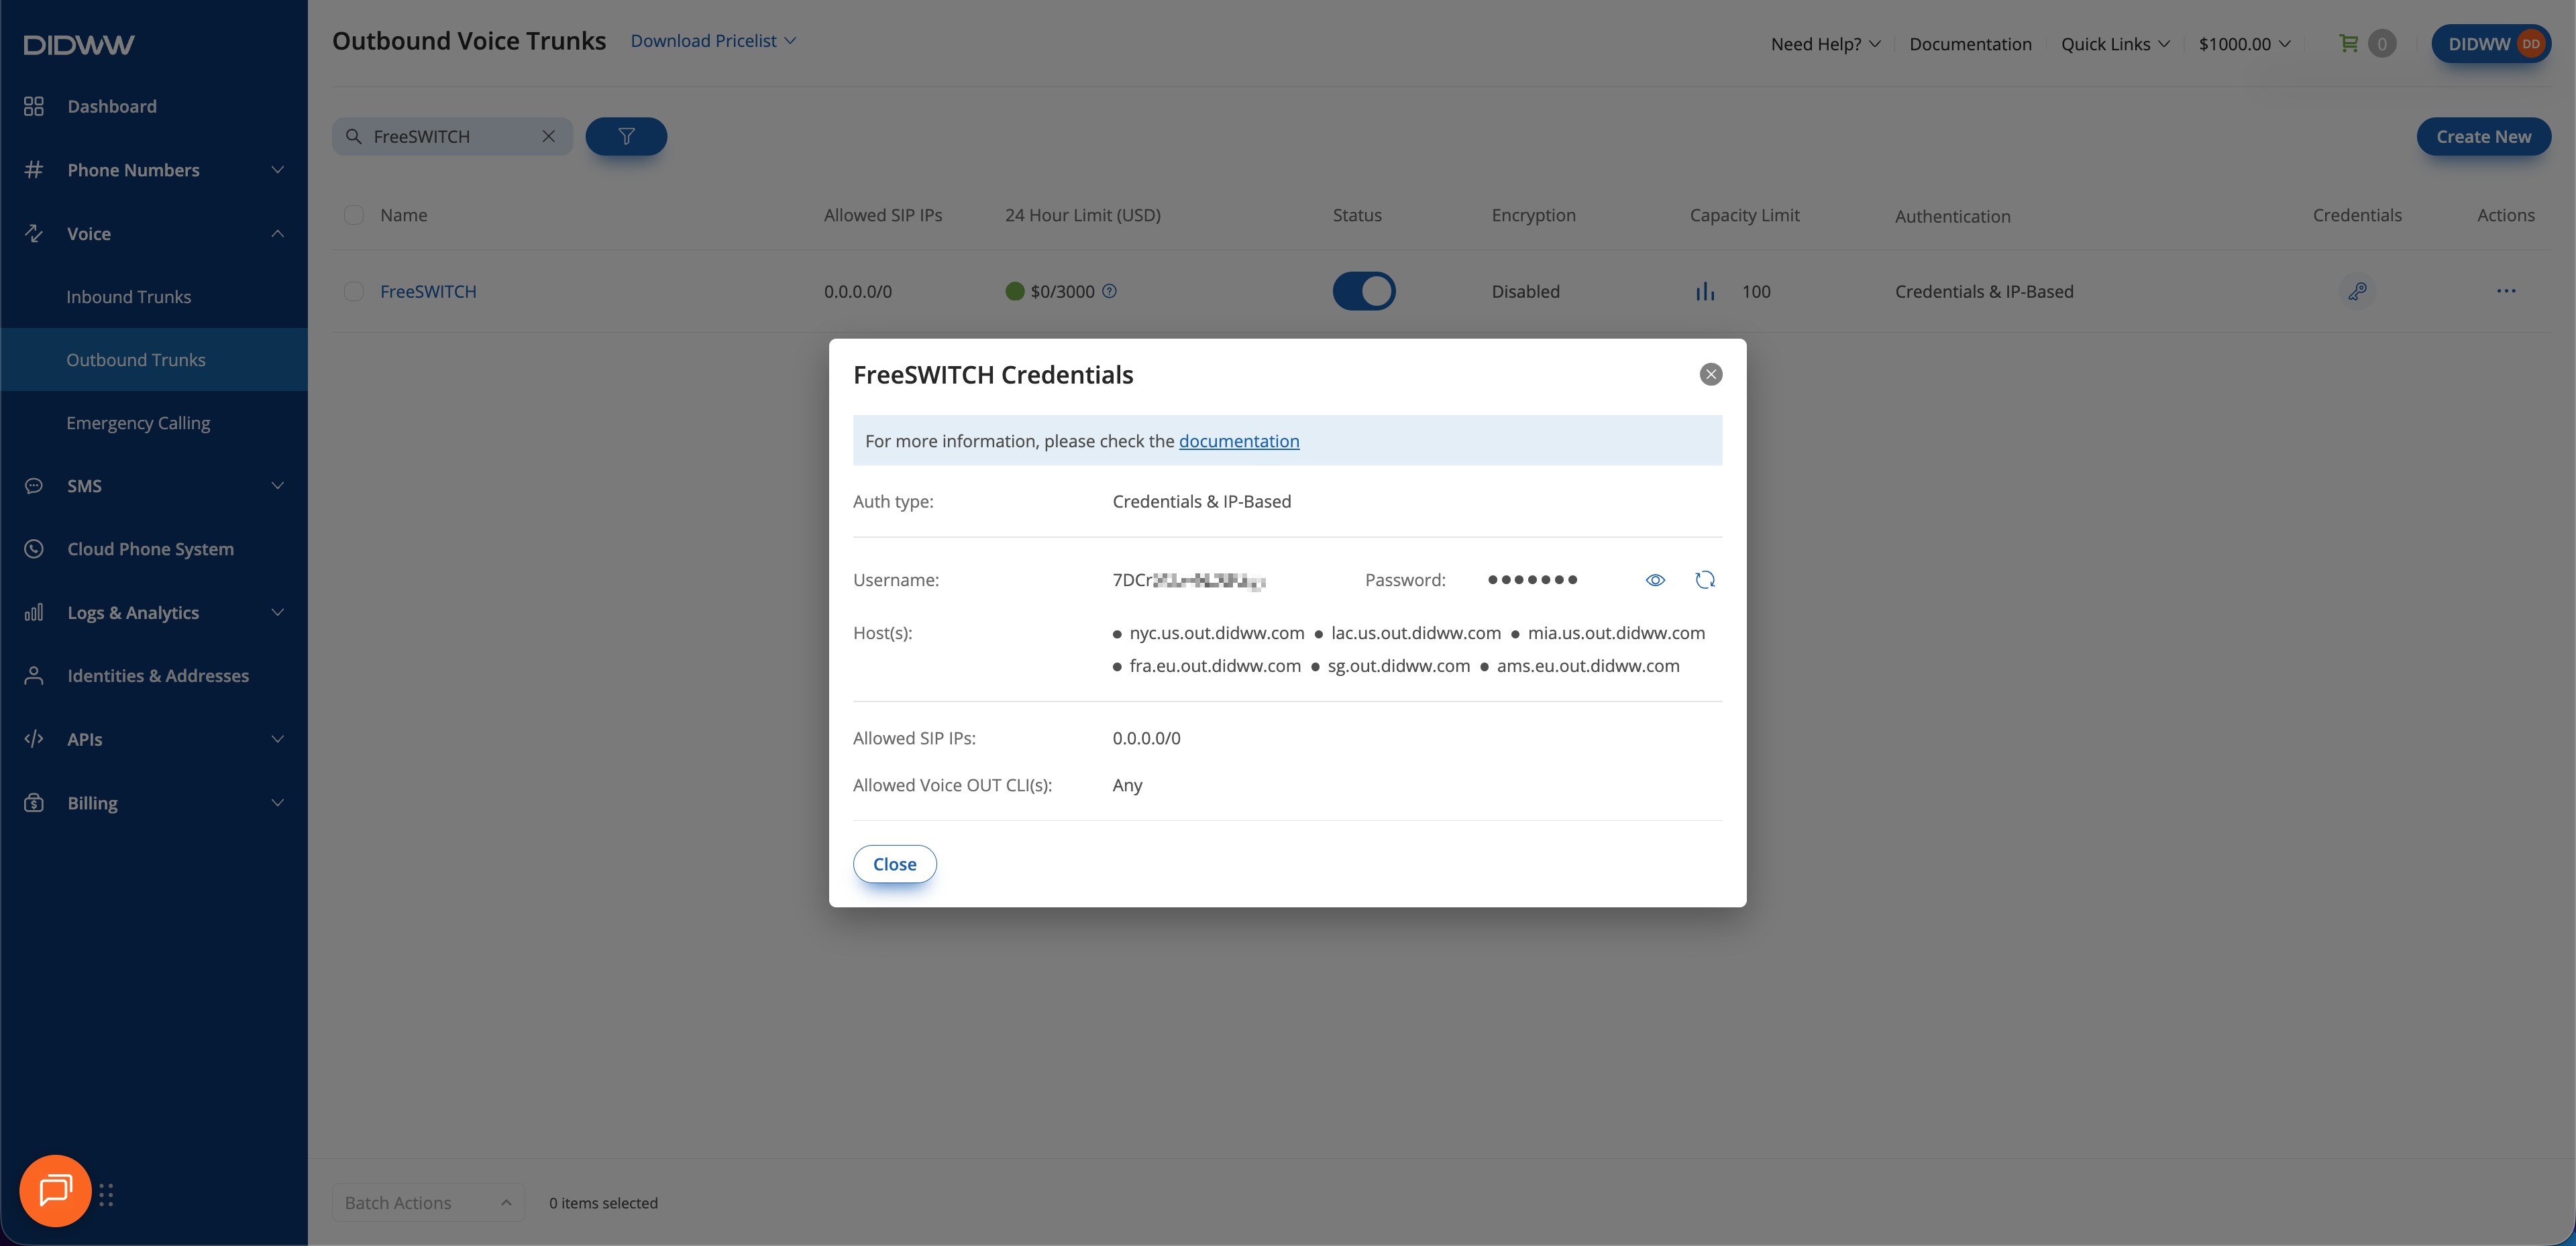](../../_images/outbound-trunk-credentials1.webp)
FreeSWITCH outbound trunk credentials and hostnames.
---
## 3. Configure FreeSWITCH
Configure the external Sofia profile, DIDWW gateways, and XML dialplan. The
examples keep internet-facing trunk traffic separate from authenticated
internal users.
### Before you begin
FreeSWITCH **1.10** or **1.11** is required with `mod_sofia` loaded and the external
Sofia profile running.
Note
The examples use `/etc/freeswitch` as the configuration directory. Adjust
the paths if FreeSWITCH uses a different configuration directory. Back up
the current configuration before making changes.
### Step 1: Configure the Sofia profile and gateways
Complete the core SIP configuration first. Then add only the optional
settings required by your deployment.
#### 1. Core SIP configuration
Configure the external Sofia profile, DIDWW ACL, and inbound and outbound
gateways required for calling through DIDWW.
##### 1.1 Configure the external Sofia profile and transport
The default external profile loads gateway files from
`sip_profiles/external`. In
`/etc/freeswitch/sip_profiles/external.xml`, confirm or add the following
settings inside the profile's `settings` element:
```
```
The extended ACL value accepts traffic from the `didww` list and sends it
to the `from-didww` dialplan context. Requests that fail the ACL are
rejected.
The examples use G.711 A-law and G.711 µ-law. See the DIDWW codec details for
[inbound calling](../../voice/inbound-trunks/technical-data/sip.html#service-did-sip-codecs) and [outbound calling](../../voice/outbound-trunks/outbound-sip-information.html#services-voice-out) before enabling other codecs.
Select the signaling transport used by the corresponding DIDWW trunks. Skip
settings that are already present in the external profile.
UDP
Use port `5080`. UDP is enabled on the default external profile, so no
additional transport settings are required.
TCP
Use port `5080`. TCP is enabled on the default external profile, so no
additional transport settings are required.
TLS
Use port `5081`. In `/etc/freeswitch/vars.xml`, enable TLS and
confirm the external TLS port:
```
```
In the external profile, confirm or add the TLS settings:
```
```
Replace `/etc/freeswitch/tls` if the SIP TLS certificate and trust
chain are stored elsewhere. The directory must contain the certificate
files required by the external Sofia profile.
For additional Sofia profile settings, see the official FreeSWITCH [SIP
profiles](https://developer.signalwire.com/freeswitch/users-and-endpoints/sip-profiles/)
documentation.
##### 1.2 Configure the DIDWW ACL
In `/etc/freeswitch/autoload_configs/acl.conf.xml`, add the following list
inside `network-lists`:
```
```
The list deliberately uses the published DIDWW IPv4 network blocks because
`apply-inbound-acl` applies to the complete external profile. This permits
inbound calls and in-dialog SIP requests associated with outbound calls. The
ACL controls SIP access only; configure media access separately in the
firewall.
Before applying the ACL, verify the current addresses in [General SIP
Information](../../voice/inbound-trunks/technical-data/sip.html#service-did-sip) and [SIP Protocol
Details](../../voice/outbound-trunks/outbound-sip-information.html#services-voice-out). This guide uses IPv4. Add the
published IPv6 ranges if
your deployment uses IPv6. If the external profile also serves other
carriers, include their trusted SIP sources without removing an existing
security policy.
##### 1.3 Configure the inbound trunk
Static Endpoint
No gateway file is required. DIDWW sends calls directly to the external
Sofia profile.
The ACL identifies trusted DIDWW traffic and routes it to the
`from-didww` context. The dialplan configured in [Step 2](#freeswitch-configure-xml-dialplan) matches the called DID
from the
Request-URI.
Dynamic Registration
Create
`/etc/freeswitch/sip_profiles/external/didww-in.xml`:
```
```
Replace `INBOUND_TRUNK_USERNAME` and `INBOUND_TRUNK_PASSWORD` with
the generated trunk credentials.
For TCP, change the registration transport:
```
```
For TLS, use the registrar's TLS port and change the registration
transport:
```
```
`sip.didww.com` is the authentication realm. The example uses
`nyc.sip.didww.com` as the registration proxy. To use automatic
location selection or another published regional proxy, see
[SIP Registrars](../../voice/inbound-trunks/technical-data/sip.html#service-did-sip) and change the proxy hostname.
Keep the port and transport required by the selected signaling
transport.
The fixed `extension` sets the FreeSWITCH dialplan destination to
`didww-inbound` for calls received through this gateway. To route by
called DID instead, enable **Use DID in R-URI** in the DIDWW User Panel
and set the gateway `extension` to `auto_to_user`. That variation is
not used in this guide.
##### 1.4 Configure the outbound trunk
Create `/etc/freeswitch/sip_profiles/external/didww-out.xml`:
```
```
Replace `OUTBOUND_TRUNK_USERNAME` and `OUTBOUND_TRUNK_PASSWORD` with the
credentials copied from the DIDWW User Panel.
Use the `proxy` parameter for the selected signaling transport:
UDP
```
```
TCP
```
```
TLS
```
```
`out.didww.com` is the fixed digest authentication realm. The example uses
`nyc.us.out.didww.com` as the call-routing proxy. Select the appropriate
regional hostname under [Signaling
Endpoints](../../voice/outbound-trunks/outbound-sip-information.html#voice-out-signaling-endpoints) and change the proxy
hostname. Keep the port
and URI transport parameter required by the selected signaling transport.
Important
Keep `register` set to `false`. DIDWW authenticates outbound INVITE
requests by the allowed source IP address and SIP digest credentials. The
outbound trunk does not register to DIDWW.
For additional gateway settings, see the official FreeSWITCH
[gateways](https://developer.signalwire.com/freeswitch/users-and-endpoints/gateways/)
documentation.
#### 2. Optional trunk configuration
Use only the sections required by your deployment. Configure NAT when
FreeSWITCH is behind NAT. Media encryption and T.38 fax are optional.
##### 2.1 Configure NAT and firewall rules
If FreeSWITCH is behind NAT, set the public signaling and media addresses in
`/etc/freeswitch/vars.xml`:
```
```
Replace `203.0.113.10` with the public IP address and forward the external
Sofia signaling port and the configured FreeSWITCH RTP range to the server.
For inbound calls, allow signaling and media from the addresses and ports in
[General SIP Information](../../voice/inbound-trunks/technical-data/sip.html#service-did-sip). For outbound calls, allow
FreeSWITCH to reach the signaling endpoints and exchange media using the
addresses and ports in [SIP Protocol
Details](../../voice/outbound-trunks/outbound-sip-information.html#services-voice-out).
This guide assumes that RTP media passes through FreeSWITCH. If you enable
bypass media, configure the firewall and NAT rules for direct RTP between
DIDWW and the call endpoint.
For details about Sofia NAT settings, see the official [SIP profile NAT
reference](https://developer.signalwire.com/freeswitch/users-and-endpoints/sip-profiles/#nat-traversal).
##### 2.2 Configure SRTP media encryption
The FreeSWITCH media-encryption configuration must match the corresponding
DIDWW trunk. DIDWW supports SDES, DTLS, and ZRTP for SRTP key negotiation.
This guide uses SDES because it is supported by the standard FreeSWITCH Sofia
SIP trunk configuration. FreeSWITCH primarily uses DTLS-SRTP for WebRTC, and
ZRTP is not covered by this configuration.
The following dialplan action requires SDES-SRTP on an outbound leg:
```
```
Add the action before `bridge` in [Configure outbound routing](#freeswitch-configure-outbound-routing). When every call
on the external
profile must use SRTP, you can also add the following profile setting:
```
```
Select SDES as the SRTP method in the [inbound
trunk](../../voice/inbound-trunks/creating-a-new-sip-trunk.html#user-panel-sipin-trunk-media-dtmf) and [outbound
trunk](../../voice/outbound-trunks/outbound-trunk-reference.html#outbound-trunk-create-media) settings. Use TLS
signaling to protect SDES
keys carried in SDP.
For FreeSWITCH behavior and supported suites, see the official [secure media
documentation](https://developer.signalwire.com/freeswitch/media-and-codecs/handling/#secure-media-with-srtp).
Note
Encryption applies only to the call leg between DIDWW and FreeSWITCH. It is
not end-to-end encryption.
##### 2.3 Configure T.38 fax passthrough
For an inbound DID that supports T.38, add this setting to the external Sofia
profile:
```
```
The dialplan must bridge the call to a T.38-capable endpoint or application.
For T.38 availability and G.711 fax alternatives, see
[FAX Services](../../voice/inbound-trunks/technical-data/fax-services.html). For FreeSWITCH
fax behavior, see the official [Fax and T.38
documentation](https://developer.signalwire.com/freeswitch/applications/fax/).
### Step 2: Configure the XML dialplan
The FreeSWITCH XML dialplan determines how calls are routed. Add rules that
send inbound DIDWW calls to a local extension and send outbound calls through
the DIDWW gateway.
#### 1. Configure inbound routing
Create `/etc/freeswitch/dialplan/didww-inbound.xml` with the configuration
for the selected inbound trunk type.
Static Endpoint
Match the DID from the Request-URI and bridge the call to internal user
`1001`:
```
```
Replace `12025550123` with the assigned DID and `1001` with the
internal user, application, or destination that should receive the
call.
Dynamic Registration
Match the fixed extension from the `didww-in` gateway and bridge the
call to internal user `1001`:
```
```
Replace `1001` with the internal user, application, or destination
that should receive the call.
#### 2. Configure outbound routing
Add the following extension to a dialplan context used only by authenticated
internal users. A standard FreeSWITCH installation normally assigns these
users to the dialplan context named `default`.
Create `/etc/freeswitch/dialplan/default/10_didww_outbound.xml`:
```
```
Replace `12025550123` with a caller ID allowed by the outbound trunk. Send
destination and caller ID numbers in E.164 format. For example, dial
`12025550199`. See [Outbound dialing](../../voice/outbound-trunks/routing-dialing/outbound-dialing.html)
for the supported number formats.
Warning
Do not place the outbound extension in `from-didww` or `public`. Those
contexts receive internet-facing traffic and must not provide access to the
outbound gateway.
For XML dialplan concepts and syntax, see the official [FreeSWITCH XML
dialplan documentation](https://developer.signalwire.com/freeswitch/dialplan/xml/).
### Step 3: Load and verify the configuration
Run the following command from the operating-system shell to connect to the
FreeSWITCH console:
```
fs_cli
```
From the FreeSWITCH console, reload the XML configuration and ACL, then rescan
the external profile for gateway changes:
```
reloadxml
reloadacl
sofia profile external rescan
```
Changes to profile settings such as the listening port, TLS, or profile ACL
may require a profile restart. Run the following command from the FreeSWITCH
console:
```
sofia profile external restart reloadxml
```
Warning
Restarting a Sofia profile ends active calls on that profile. Perform the
restart during a maintenance window.
Use the following commands to confirm that FreeSWITCH loaded the
configuration and can communicate with DIDWW:
| Check | Command |
| --- | --- |
| FreeSWITCH status | `status` |
| Loaded Sofia profiles | `sofia status` |
| External profile details | `sofia status profile external` |
| Inbound gateway registration | `sofia status gateway didww-in` |
| Outbound gateway | `sofia status gateway didww-out` |
| Active calls | `show calls` |
| Active channels | `show channels` |
| Live SIP trace | `sofia global siptrace on` |
The `didww-in` gateway check applies only to Dynamic Registration. Its state
should be `REGED` before testing inbound calls. The `didww-out` gateway
does not register, so verify that it is loaded and available rather than
expecting a registration state.
Place an inbound test call to the DID configured in the inbound dialplan and
confirm that the configured internal destination rings. Then place an outbound
test call from an authenticated internal user to a valid destination. Confirm
two-way audio and DTMF in both directions.
#### Common issues
A profile, gateway, or dialplan rule does not load.
Run `reloadxml` and check the FreeSWITCH console for the file name and
line number of any XML error.
Use `sofia status profile external` to check the profile. Use
`sofia status gateway didww-in` or `sofia status gateway didww-out` to
check a gateway. After changing a gateway file, run
`sofia profile external rescan`.
Inbound calls receive `403` Forbidden.
This normally means that the `didww` ACL rejected the request. Confirm
that the source address appears in the current DIDWW signaling ranges.
Run `reloadacl` after changing `acl.conf.xml` and use
`sofia global siptrace on` to inspect the request source.
A Static Endpoint call reaches FreeSWITCH but does not reach the internal endpoint.
Confirm that the User Panel trunk uses `{DID}` as the User Part of R-URI
and sends calls to the external profile's public host and port.
Confirm that the received `destination_number` matches the DID in
`didww-inbound.xml`.
A Dynamic Registration gateway remains unregistered.
Run `sofia status gateway didww-in`. Confirm the inbound username and
password, the registrar hostname, port, and signaling transport.
Keep `sip.didww.com` as the realm even when a regional registrar is used
as the proxy. Use `sofia global siptrace on` to inspect the REGISTER
request and authentication response.
A Dynamic Registration call uses `didww-inbound` instead of the called DID.
This is expected with the Dynamic Registration example. The gateway uses a
fixed `extension` value. See [Configure the inbound trunk](#freeswitch-configure-inbound-gateway) for the
fixed-destination behavior
and the DID-based alternative.
Outbound calls return `403` or repeat `407` challenges.
Confirm the outbound trunk credentials, the public FreeSWITCH address in
**Allowed SIP IP addresses**, and the caller ID in the trunk's CLI settings.
Keep `out.didww.com` as the digest realm even when a regional hostname is
used as the proxy. Use `sofia global siptrace on` to check the response
from DIDWW.
An outbound call does not use the DIDWW gateway.
Confirm that the authenticated user enters the dialplan context containing
the outbound rule. The example uses the context named `default`.
Confirm that the dialed number matches the rule in
`didww-outbound.xml`. The example accepts an E.164 number without the
leading `+`.
A call has one-way audio.
Check `external_sip_ip`, `external_rtp_ip`, port forwarding, and
firewall rules.
Confirm that the applicable DIDWW RTP ranges and the FreeSWITCH RTP port
range are allowed.
A call fails with `488` Not Acceptable Here.
Confirm that FreeSWITCH and the corresponding DIDWW trunk have a common
codec.
If media encryption is enabled, confirm that the configured SRTP method
matches the trunk settings.
DTMF input is not recognized.
Confirm that the external profile uses `dtmf-type` value `rfc2833`.
This is the FreeSWITCH setting for the RTP telephone-event method commonly
referred to as RFC 2833.
FreeSWITCH cannot establish a TLS connection.
Confirm that TLS is enabled on the external profile and that the certificate
files are valid.
For a Static Endpoint inbound trunk, confirm that the DIDWW User Panel sends
calls to the external profile's TLS port, `5081` in this guide. For
Dynamic Registration and outbound calling, confirm that the DIDWW registrar
or proxy uses port `5061` and `transport=tls`.
For outbound TLS, use a regional DIDWW proxy and keep the authentication
realm set to `out.didww.com`. Use `sofia global siptrace on` to inspect
the TLS connection and SIP exchange.
For additional diagnostic procedures, see the official FreeSWITCH
[troubleshooting toolbox](https://developer.signalwire.com/freeswitch/troubleshooting/toolbox/),
[call setup troubleshooting](https://developer.signalwire.com/freeswitch/troubleshooting/call-setup/),
and [audio troubleshooting](https://developer.signalwire.com/freeswitch/troubleshooting/audio/).
On this page